This section contains information about the features of the BILLmanager 6 personal cabinet. Some features depend on the settings set by your service provider.
For support, contact your service provider via a request in your personal cabinet.
Depending on the provider's settings, two types of payments are available in your client area:
- advance payment — you top up the balance of the Personal account in any convenient way, and then pay for services with it. You can also enable auto-renewal from your Personal account and thus configure auto-payment for your services;
- payment for the service by the selected payment method — you pay for the service directly by any payment method without using your personal account. For example, by bank card or transfer. You can also save your bank card or e-wallet details in Payment methods. You can then use this card or wallet to pay for services and subscribe to services.
Advance payment
You can issue an advance payment invoice if you want to top up your personal account balance and use the money to buy new services or renew existing ones.
If you create an advance payment without linking to a specific service, the invoice will indicate "Advance payment".
Account topup
To top up the balance of your personal account:
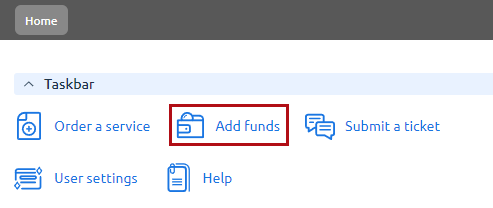
- Open the settings of your client area in the upper right corner, click Add funds.
- Specify the amount, currency and select the payment method. Press the Pay button.
- Select an existing payer or create a new one. Specify information about the payer. Press Continue.
- Press the Pay button to confirm the payment. After that, you will be redirected to the website of the selected payment system to make the payment.
The funds will be credited to your personal account.
You will find the paid invoice under Finance and documents → Invoices tab. When the payment is received, the status of the invoice will change from "Payment in progress" to "Sent".
Auto-payment
Auto-payment is an automatic topup of your personal account when your balance is low. Making a payment will not require your participation, and the balance will be topped up to an amount sufficient for a month. At the moment, auto-payment is performed through the following systems:
- Stripe;
- PayMaster;
- SimplePay;
- PayOnline.
To set up auto-payment:
- Go to Billing → Auto payment → Configure.
-
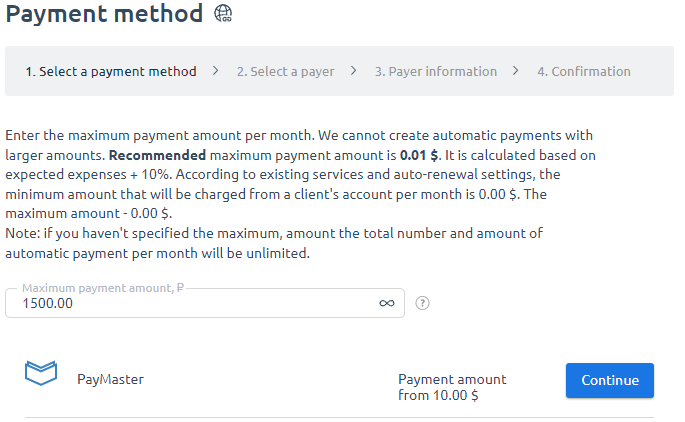
In the setup form, select a payment method and the maximum amount you can top up your balance in a month. Click Continue.
- Select a payer or create a new one. Click Next.
- Specify the payer information and click Next.
- Click Confirm. This will allow the payment system to automatically make payments for your provider's services.
Payment by selected method directly
After adding the service to your cart, you can pay for it either from your personal account or directly using any available payment method. To do this:
- Select the service in your cart and click Proceed to checkout.
- If you have previously paid for services:
- make sure that the payment method and payer are suitable for paying for the current order;
- apply the Promo code, if available.
- Click Proceed to payment.
If you need to change the payer or payment method, click the Change button.
- Select Payment method. In the window that opens, check Additional data.
- Click Next.
- Select a payer or create a new one. On this form, you can edit the payer's details or delete them.
- Click Proceed to payment.
You cannot change the payment method after placing an order. Please place a new order and select the payment method you want.
When you make a payment, you will be redirected to the payment system page. Once the payment is complete, your service will be activated.
You can save your payment method so that you don't have to re-enter your payment details in the future. You can save your bank card or e-wallet details. This can be done either during the payment process or separately in the Payment methods menu.
Saved payment methods can be used for subscriptions — the selected services will be automatically renewed from the specified card or e-wallet. For more information, see Payment methods.
How to pay by Wire transfer
When paying by wire transfer, a bank account is automatically generated to pay for services. Invoice formation algorithm:
Step 1. Choose Wire transfer and click Pay.
Step 2. Select a payer. You can select an existing payer or add a new one.
Step 3. Fill out the form and click Pay. The system will generate an invoice with banking details of both parties. You can print the invoice in the Accounts section.
Checking the balance and spent funds
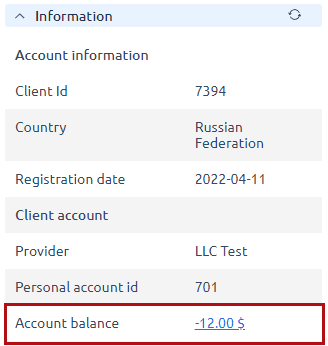
The balance of the Personal account is displayed in the upper right corner.
You can see information about funds withdrawn from the account for ordering goods and services under Billing → Expenses.
 You can set your expense display period or select one of the available default options: month, quarter, 6 months, year.
 - Date — the date when the funds were withdrawn from your account;
- Operation description — the product or service for which your account has been charged;
- Amount — the amount withdrawn for a good or service;
- Tax — the tax paid for a good or service;
- Not paid — unpaid amount for a product or service;
- Transaction number;
- Payment number — the payment from which the funds were taken to pay for the specified service. It can be either an advance payment or a payment for a certain service.
To view information about funds debited from the account for ordering goods and services, go to Billing → Expenses.

- Name — the product or service for which your account was debited;
- Date — the date on which the funds were withdrawn from your account;
- Amount — the amount written off for the product or service;
- Payments — payment from which funds were taken to pay for the specified service. It can be both advance payment and payment for a certain service.
Payment for a particular service
If you have chosen a service, you can pay for it immediately. To do this, click Pay or Add to cart. Enter the amount and choose the payment method. When paying for a particular service you will be redirected to the payment system’s web page. After your payment has been processed, the service will be activated
Information about the credit limit
Platform operation with enabled credit limit:
On the first day of each month, the billing platform generates invoices for unpaid expenses over the preceding month. After the invoice is issued, payment must be made by the 15th day of the current month. From the 16th day, the payment becomes overdue. A grace period of 15 days is given to effect the overdue payment.
If the overdue payment is not repaid, the credit limit will become unavailable from the 30th day of the current month.
When the credit limit is blocked, the following actions are not available:
- payment for a service;
- service renewal through the cart;
- auto-renewal from the personal account.
The following actions remain available with a credit limit blocked:
- personal account topup;
- auto-renewal by means of saved payment methods.
The debt is displayed in the client area:
- on the main page;
- in the page header.
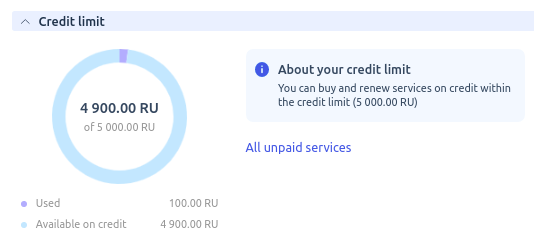
The client will receive a notification at the time the payment is made. If the payment is not received, notifications will be sent:
- three days before the due date;
- the day after the due date;
- five days before the blocking date;
- on the blocking day.
Payment and unblocking
History and invoices are available under Finance and documents.
Blocked services, for which auto-renewal from the personal account is configured, will be enabled automatically once the overdue payment is received.
Invoice information
Invoices issued for unpaid expenses can have one of three statuses:
- payable — the invoice has been issued;
- partly paid — a part of expenses in the invoice has been paid;
- fully paid — all expenses in the invoice have been paid.
Invoice statuses:
- Invoice issued.
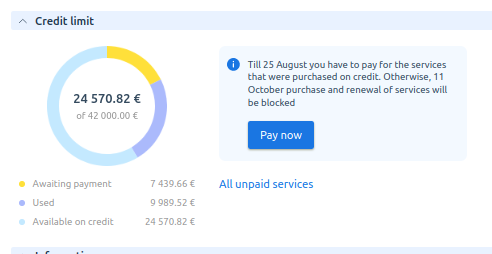
The following are displayed on the dashboard:- schedule with details of credit limit expenses;
- details of the invoice issued indicating the due dates;
- information about service blocking in case of payment overdue.
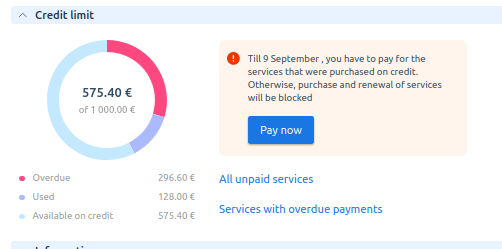
- Invoice not paid until grace period expiry date.
Amounts displayed on the dashboard:- available — balance of available credit limit;
- overdue — amount of unpaid invoices;
- not paid — amount of expenses for services purchased on credit after the first issued invoice
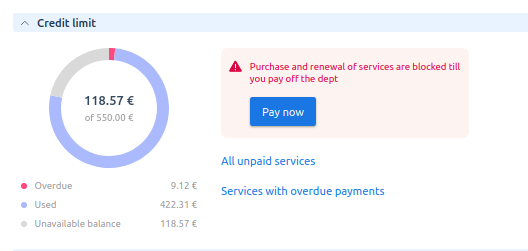
- Debt not paid.
A message is displayed on the dashboard: "Renewal and purchase of services are blocked until the debt is paid in full”.
 En
En
 Es
Es