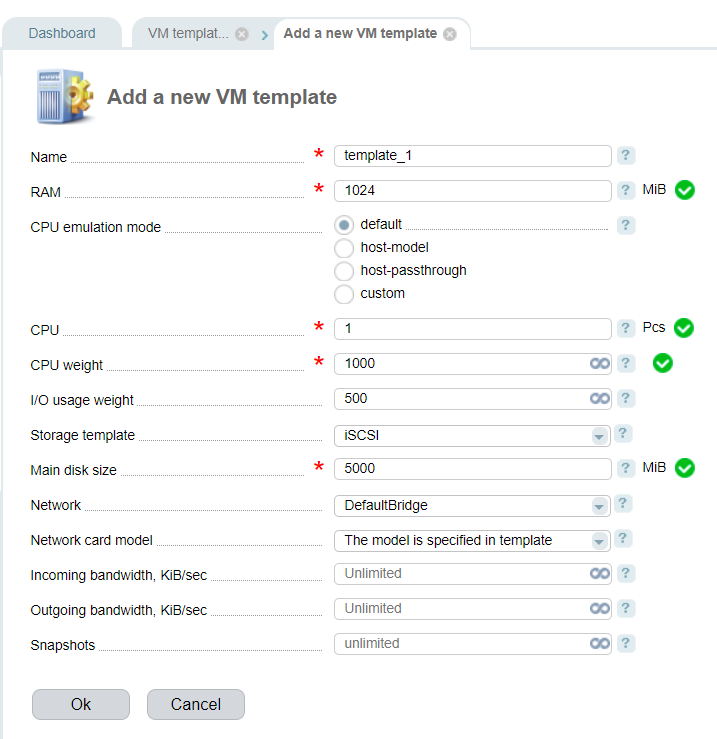
Virtual machines are created on cluster nodes based on pre-defined templates of virtual machines (VM templates).
To create a VM template navigate to Cluster settings→ VM templates→ Add.

- Name — enter the name for the template;
- CPU emulation mode — the default values are set according to the selected VM template (Do not change this mode unless necessary!):
- Default — virtual QEMU CPU is emulated;
- Host—model — uses CPU description defined by libvirt, based on a cluster node processor;
- Host—passthrough — fully emulates CPU of the cluster node;
- Custom:
- CPU model — e.g. "pentium3", "core2duo". The models are listed in the /usr/share/libvirt/cpu_map.xml file on the cluster node. You can add models corresponding to their vendor, architecture and CPU features;
- CPU features — CPU features that should be activated. Execute the virsh capabilities command on the cluster node to list all the CPU features.
- Resources that will be allocated to a virtual machine created from this template:
- Main disk size, RAM, CPU — set resources for the virtual machines;
- Limits that will be applied to a virtual machine created from this template:
- CPU weight — enter the cgroups weight for CPU;
- I/O usage weight — cgroup weight on group operations;
- Incoming traffic, Outgoing traffic — traffic limits;
- Snapshots — the maximum number of snapshots that a user can create for this virtual machine.
- Storage template — select a template where the VM disk will be located. You can set up storages in Cluster settings → Storage templates;
- Network that the virtual machine will be connected to. Networks can be configured in Cluster settings→ Networks;
- Network card model — a list of models of the virtual network card. The default value is “The model is specified in the template”, so the card model will be selected according to OS template;
- Incoming traffic, KiB/sec — the maximum amount of incoming traffic;
- Outgoing traffic, KiB/sec — the maximum amount of outgoing traffic;
- Snapshots limit — the maximum amount of snapshots.
 En
En
 Es
Es