Virtual machines are created on cluster nodes based on pre-defined templates of virtual machines (VM templates). For more information about VM templates refer to the article Create a virtual machine template.
Creating a virtual machine
To create and manage a virtual machine, navigate to Management → Virtual machines.
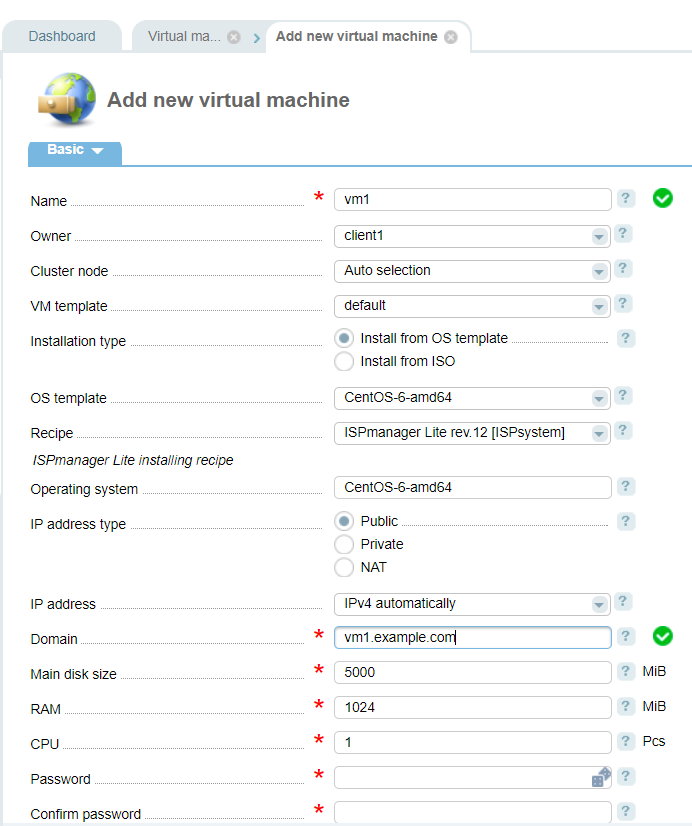
Main
- Name;
- Owner;
- Cluster node — select a cluster node where the virtual machine will be created. By default a cluster node is selected automatically (for more details refer to the article Distribution of virtual machines between cluster nodes);
- Installation type — select how to install an operating system on the virtual machine:
- Install from OS template — select an OS template". Learn more OS templates;
- Install from ISO — select an ISO— image. You can add ISO— images in Management→ ISO— images.
- Recipe — selected a recipe (script) that will be executed on the virtual machine after OS deployment. More information can be found under Recipes;
- Operating system — enter any name for the operating system;
- IP— address type:
- Public — can be accessed from the Internet;
- Private — cannot be accessed from the Internet;
- NAT — access behind NAT.
- IP— address — allocation type: manually or automatically allocate one or several IP addresses;
- Domain — enter the domain name for the virtual machine;
- Main disk size, RAM, CPU — set resources for the virtual machines. By default resources from the VM template will be specified;
- Password and Confirm password — enter superuser password. It can be also used to gain access via VNC (the first 8 characters of the password).
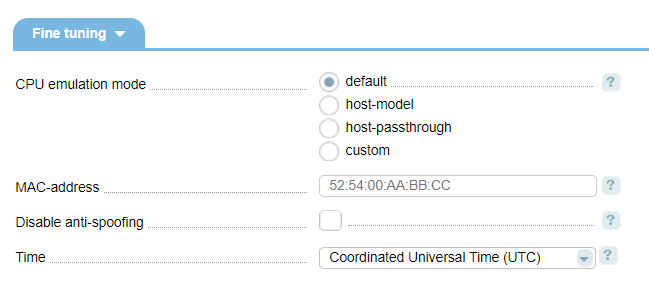
Fine tuning
- CPU emulation mode — the default values are set according to the selected VM template:
- Default — virtual QEMU CPU is emulated;
- Host— model — uses CPU description defined by libvirt, based on a cluster node processor;
- Host— passthrough — fully emulates CPU of the cluster node;
- Custom:
- CPU model — e.g. "pentium3", "core2duo". The models are listed in the /usr/share/libvirt/cpu_map.xml file on the cluster node. You can add models corresponding to their vendor, architecture and CPU features;
- CPU features — CPU features that should be activated. Execute the virsh capabilities command on the cluster node to list all the CPU features.
- MAC— address of the virtual machine;
- Disable anti-spoofing — the system creates anti-spoofing rules by default. Select the check box to disable anti-spoofing rules for the selected virtual machine;
- Time — select the time synchronization types between the virtual machine and server.
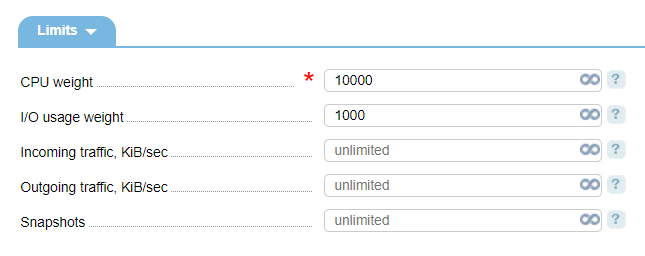
Limits
- CPU weight — enter the cgroups weight for CPU (from 128 to 10000);
- I/O usage weight — cgroup weight on group operations (from 100 to 1000);
- Incoming traffic, Outgoing traffic — traffic limits;
- Snapshots — the maximum number of snapshots that a user can create for this virtual machine.
SSH keys
- Public SSH keys — enter public SSH keys that will be added to the operating system you are going to install.
Notes
- Notes — enter any information related to this virtual machine
After you have added the parameters, the OS deployment procedure will start (depending on the OS template or ISO-image you have selected before). Once completed, the virtual machine is ready to use.
VM management
Navigate to Management → Virtual machines.
Click on Migration to migrate the virtual machine to another cluster node. Learn more Migration of virtual machines;.
Click on Passwordto change the password of the virtual machine. This function is available only for Linux virtual machines which disks are located in any storage except for RBD. The method mount.linux is used for password change. The method uses the package guestfish.
How it works:
-
VMmanager stops the virtual machine and mounts the virtual disk:
guestmount — a <disk_image> — i <the path to the mount point> -
VMmanager executes chroot:
mount — t proc proc <the path to the mount point>/proc mount — o bind /dev <the path to the mount point>/dev mount — o bind /sys <the path to the mount point>/sys chroot <the path to the mount point> -
VMmanager changes the password:
usermod — p 'new-password' root - VMmanager executes unmount.
Click on Disks connect or disconnect virtual disks and ISO-images to the virtual machine.
Click on Interfaces to manage the network interface of the virtual machine.
Click on IP addresses to manage the IP addresses of the virtual machine. Alias IP addresses for the already created virtual machine should be added in the control panel and assigned to the interface manually. When you install Windows on the virtual machine, the alias IP addresses are not added into the system.
Click on Filters to manage a list of TCP-port filters.
Click on Snapshots to create and manage VM snapshots. Learn more in Backup configuration;
Click on VNC to connect to a virtual machine via VNC from the control panel and access the console of the virtual machine. Learn more “VNC”.
Disk size in the LVM-storage must be divisible by the PE Size value of the physical volume.
 En
En
 Es
Es


