 En
En
 Es
Es
Folders let you structure the list of virtual machines (VMs). For example, you can group VMs into folders that reflect your business or project structure ("Development", "Testing", "Clients", and so on).
A folder in VMmanager is a logical object for grouping. Placing VMs inside a folder does not affect the physical location of VM files on disk. Each VM can belong to only one folder.
This article provides instructions for configuring access rights and working with folders.
Access rights
By default, access to VM folders is allowed only for platform administrators. To let a user work with folders, create a role for them and configure the objects:
- Folder-based interface — displays the folder structure and allows moving VMs between folders;
- Folder management — allows creating, editing, and deleting folders.
For details, see Managing user roles.
Working with folders
Displaying folders and navigation
To display the VM list as a folder tree, go to Virtual machines and click the  icon. To return to the general VM list, click the
  icon.
icon.
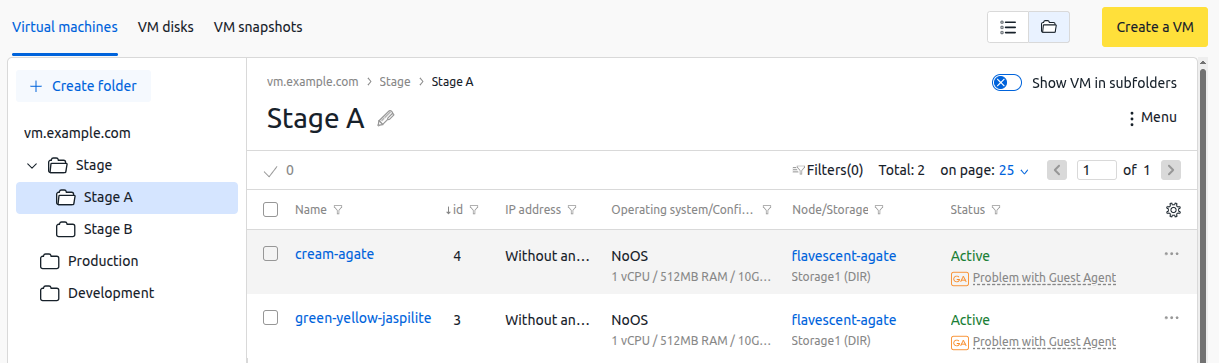
The folder structure is shown on the left side of the window. The root folder name matches the platform domain name. To open a folder, click its name.
The VM list in the selected folder is shown on the right side of the window displayed. To show VMs in subfolders, enable the Show VM in subfolders switch.
Creating folders
To create a folder:
- Click Create folder.
- Enter New folder name.
- If you want to open the folder after creation, enable Go to the created folder.
- Click Create folder.
You can create a nested folder inside a folder. To do this, go to the required parent folder →  menu → Create subfolder.
VM operations
To create a VM in a folder, go to the required folder and click Create a VM. For details, see Creating a virtual machine.
To move a VM to a folder, in the VM row click  → Move to folder → select the required folder → click Remove.
You can move several VMs at once. To do this:
- Go to the folder.
- If you need to move VMs in subfolders, enable the Show VM in subfolders switch.
- Select the required VMs in the left column of the table.
- Click the
 icon → Move to folder.
 - If you need to move VMs in subfolders, choose the move mode:
- Copy subfolder structure — the same subfolders that currently contain the VMs will be created in the destination folder. If subfolders with these names already exist, the VMs will be moved into them;
- Do not create subfolders — the VMs will be placed in one selected folder.
- Select the destination folder.
- Click Remove.
Editing folders
To rename a folder:
- Go to the folder.
- Click the
 icon to the right of the folder name.
 - Enter a new name.
- Click Save.
To move a folder:
- Go to the folder.
- In the right side of the window, open the menu → Move folder → select the destination folder → click Remove.
Deleting folders
To delete a folder:
- Go to the folder.
- Move or delete the VMs that are in this folder and in its subfolders.
- In the right side of the window, open the menu → Delete. If the folder contains subfolders, they will also be deleted.
Related topics: