

Now you can quickly add VMmanager to Zabbix monitoring to keep track of the status of your virtual infrastructure and hosts. Zabbix added an integration script to its repository for this purpose. Read more about installation in the article by ISPsystem DevOps Engineer Ilya Kalinichenko.
In the previous part, I explained How to configure the monitoring of VMs created in VMmanager through Zabbix. However, such a solution is not always sufficient. Often you need to monitor not only virtual machines, but other infrastructure objects as well. An administrator can have all kinds of questions:
- Is the VMmanager platform working? Is it responding to user requests?
- Has an error occurred while running a task, such as creating a VM or changing the configuration?
- What is the current condition of the nodes?
- How are the services running on the node?
All of this information can be tracked in the widgets of the platform itself. Read more about this in Monitoring in VMmanager.
Another option is to add VMmanager to the Zabbix monitoring system. This is especially useful if you already use Zabbix for other tasks - it is easier to monitor the status of services from the same point.
Connecting VMmanager to monitoring is easy enough - for this we wrote a template that Zabbix added to its repository. I will explain how to use it below.
Adding VMmanager to Zabbix
- 1. If you do not have a Zabbix server yet, you can easily deploy one on a virtual machine by means of a script. Previously I wrote about this in How to deploy Zabbix in a few minutes.
- 2. Then, to configure VMmanager monitoring, download the template file..
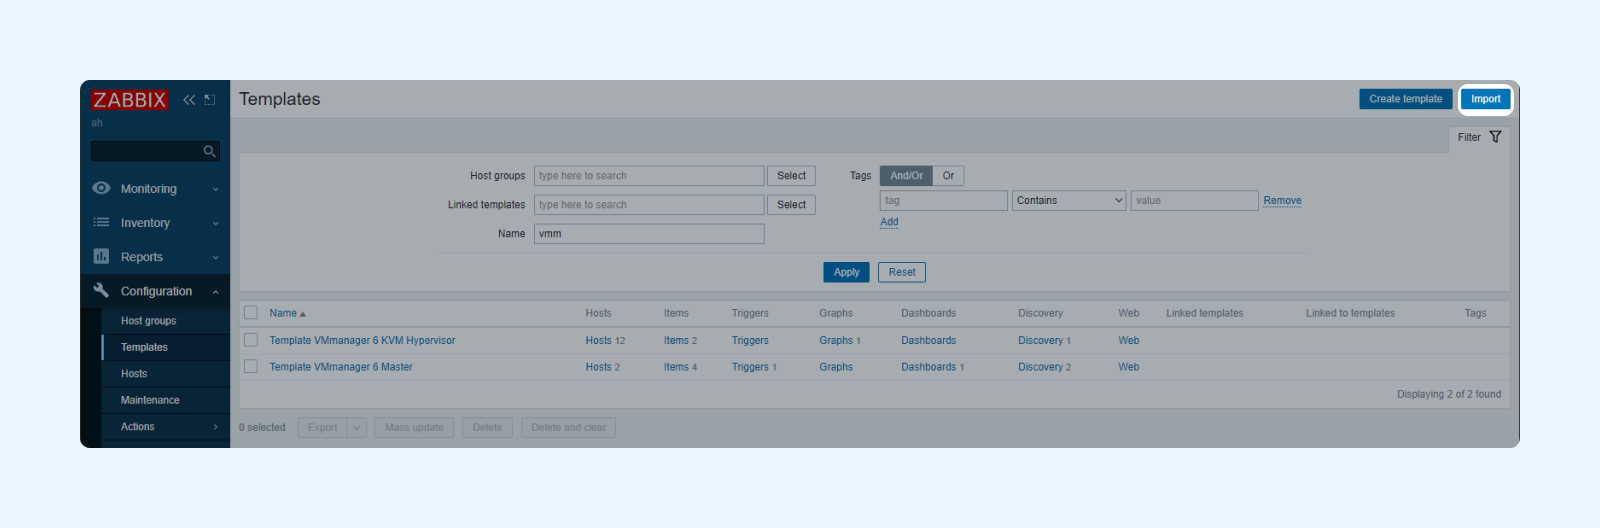
- 3. Добавите в Zabbix шаблон для работы с VMmanager 6. Для этого перейдите в меню Zabbix:
Configuration -> Templates -> Import -> select the file
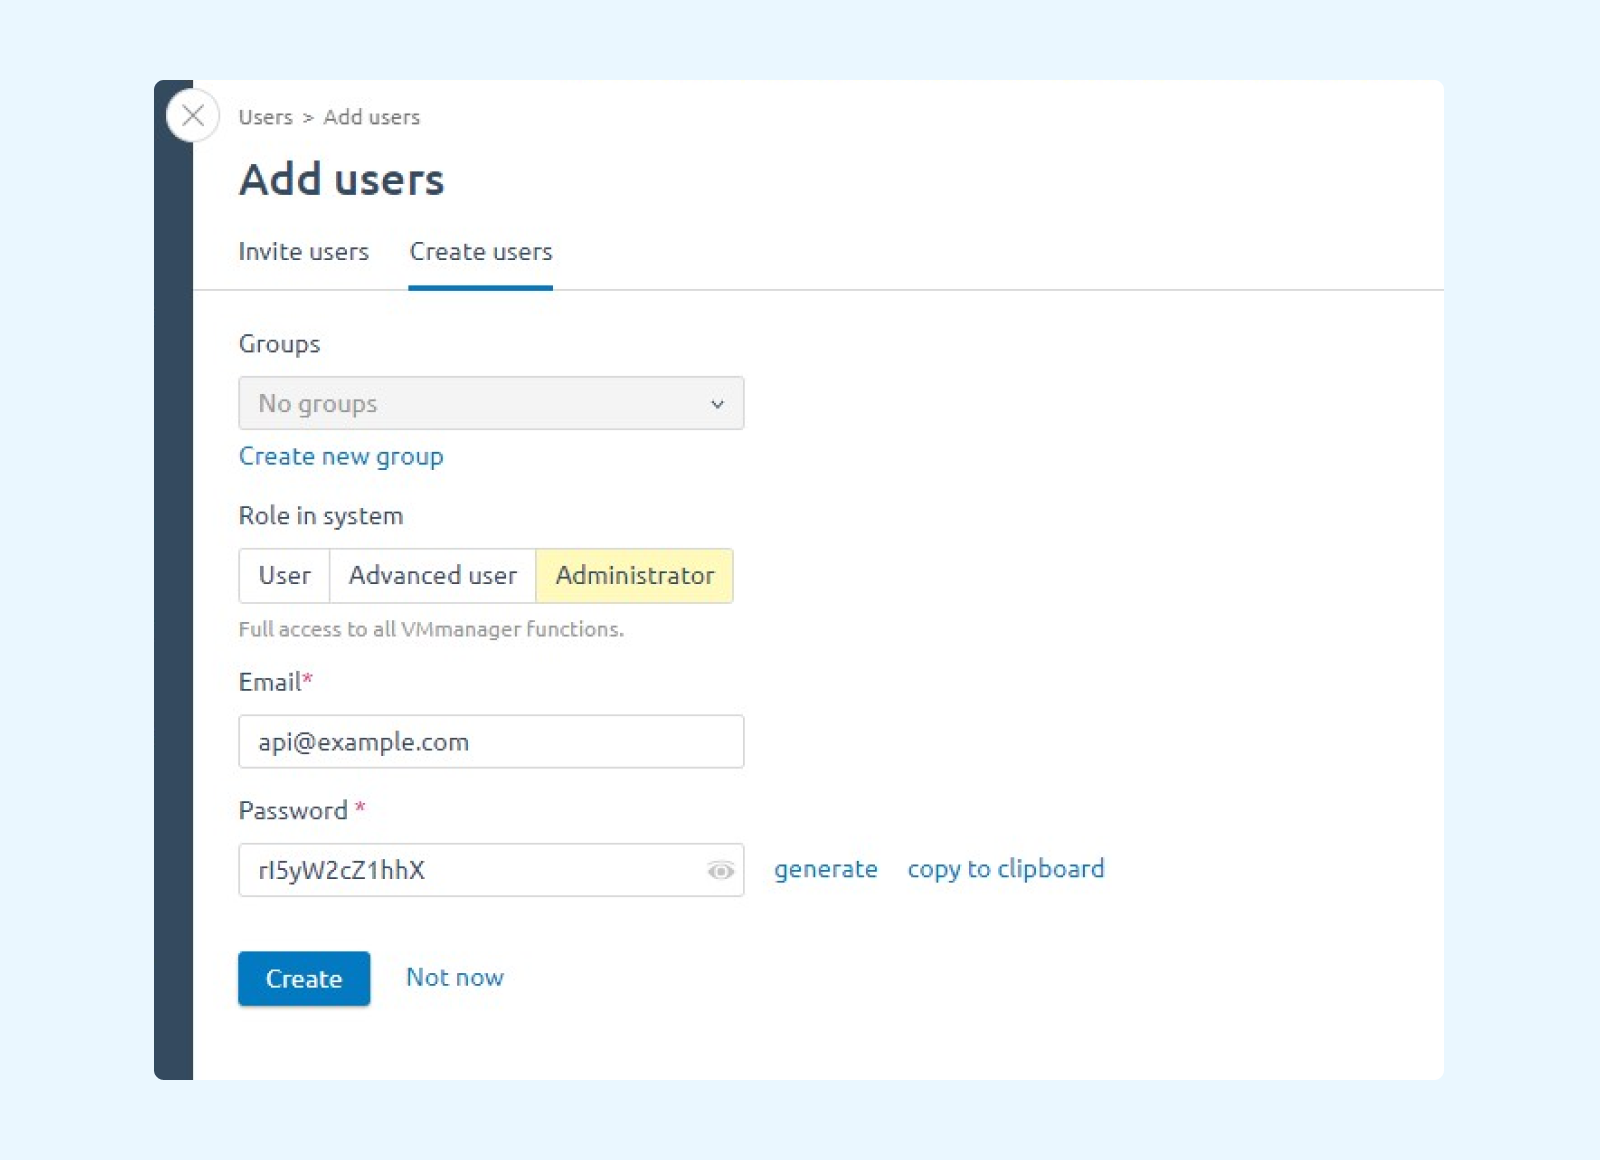
- 4. In the Users section of VMmanager, create a user to work with the API.
- 5. Get an authorization token using Curl:
    ~ $ curl -s -X POST -H "accept: application/json" -H "Content-Type: application/json" -d '{"email":
    "api@example.com", "password": "iQ3xK6nJ2dnY"}' "https://vm6.example.com/auth/v4/public/token"
    {"id":"69","token":"69-a56c5bd9-ba6b-489e-a670-c452cbdd3b70"}
Paste your password and URL into the command. Copy the Token.
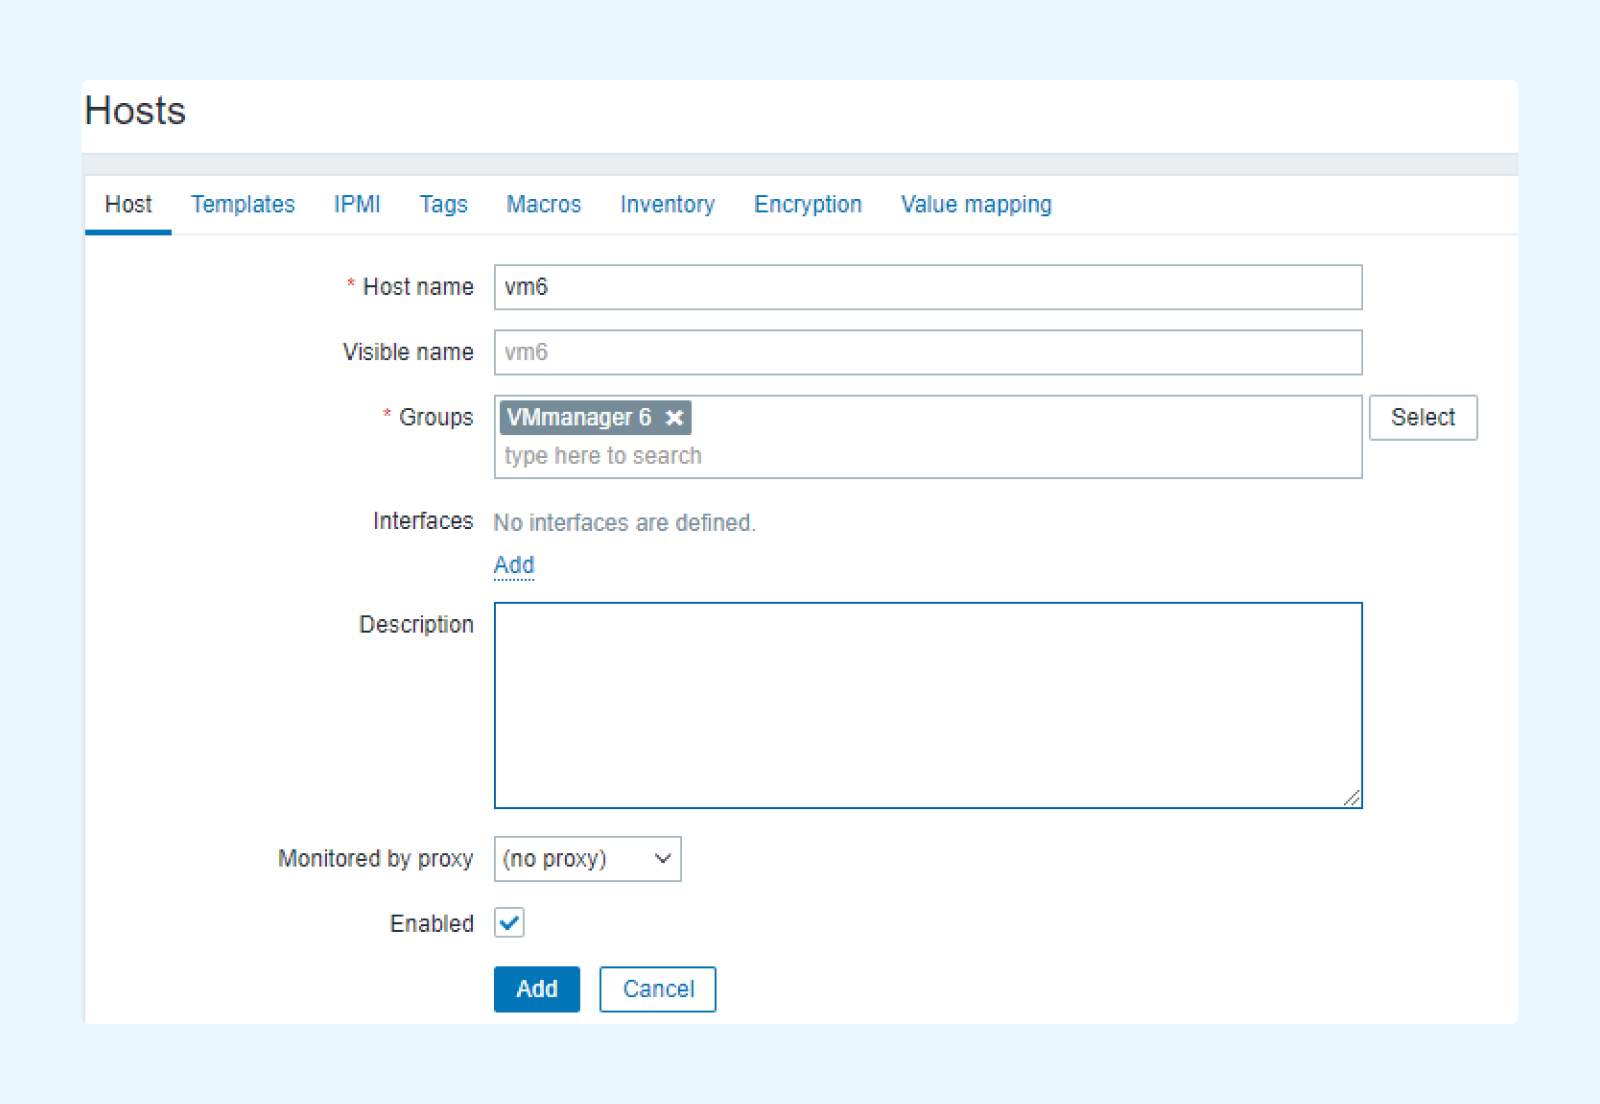
- 6. Add the server with VMmanager to Zabbix:
-
- 6.1. Configuration -> Hosts -> Create Host
-
- 6.2. Fill in the name, create a new group. Add an Agent interface
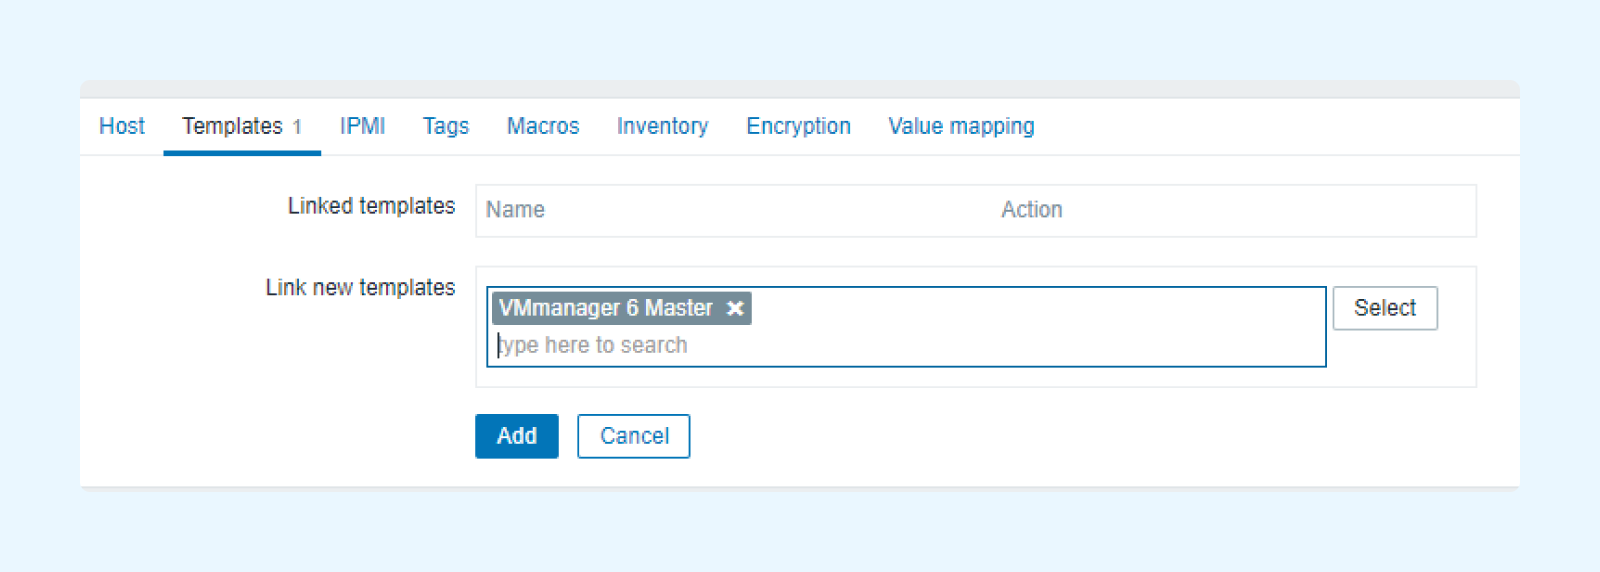
- 6.3. Then in the Templates section, attach the template
-
- 6.4. In the Macros section, add two macros:
{$VM6_TOKEN} — the token that you had received earlier
{$VM6_URL} — https://__VM_DOMAIN__/vm/v3
Completed
- 7. Next, you must install Zabbix-agent2 on the nodes. Add the Ansible script to the platform. Do not forget to replace __SERVER_IP__ by you server's IP address.
    ---
    - name: Install zabbix-agent playbook
    hosts: all
    debugger: on_failed
    tasks:
    - name: Install zabbix-release CentOS 8
    yum:
    name: https://repo.zabbix.com/zabbix/5.0/rhel/8/x86_64/zabbix-release-5.0-1.el8.noarch.rpm
    state: present

    - name: Install zabbix-agent2 package
    package:
    name: zabbix-agent2
    state: present

    - name: Change Server IP
    lineinfile:
    path: /etc/zabbix/zabbix_agent2.conf
    regexp: 'Server=127.0.0.1'
    line: "Server=127.0.0.1,__SERVER_IP__"

    - name: Change Active Server IP
    lineinfile:
    path: /etc/zabbix/zabbix_agent2.conf
    regexp: 'ServerActive=127.0.0.1'
    line: "ServerActive=127.0.0.1,__SERVER_IP__"

    - name: Start zabbix-agent2
    service:
    name: zabbix-agent2
    state: started
    enabled: yes

    - name: Create a new sudoers file
    file:
    path: /etc/sudoers.d/zabbix
    state: touch
    mode: 0400
    owner: root

    - name: Add sudoers
    copy:
    dest: /etc/sudoers.d/zabbix
    content: |
    Defaults:zabbix !requiretty
    Cmnd_Alias ZABBIX_CMD = /usr/bin/virsh -q list, /usr/bin/virsh -q list --all
    zabbix ALL = (root) NOPASSWD: ZABBIX_CMD

    - name: Add vmmanager config to zabbix
    file:
    path: /etc/zabbix/zabbix_agent2.d/vmmanager.conf
    state: touch
    mode: 0644
    owner: root

    - name: Configure zabbix for VMmanager
    copy:
    dest: /etc/zabbix/zabbix_agent2.d/vmmanager.conf
    content: |
    UserParameter=vm.all,sudo virsh -q list --all | wc -l
    UserParameter=vm.running,sudo virsh -q list | wc -l
- 8. Run the script on the nodes.
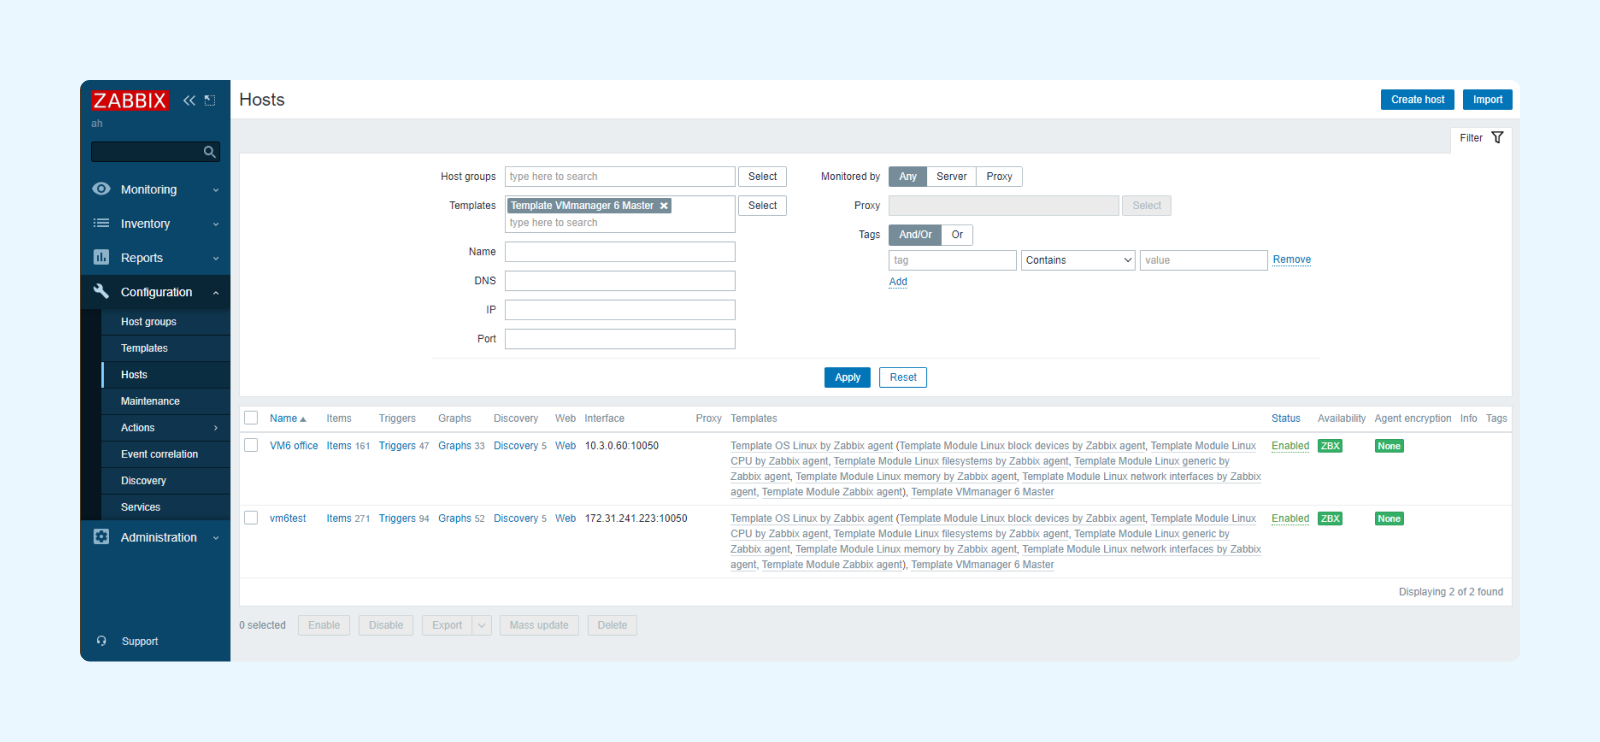
- 9. Add the nodes to Zabbix manually (Configuration -> Hosts -> Create host) or automatically:
- 9.1. Enter Configuration -> Hosts
- 9.2. Find VMmanager 6
- 9.3. Enter Discovery
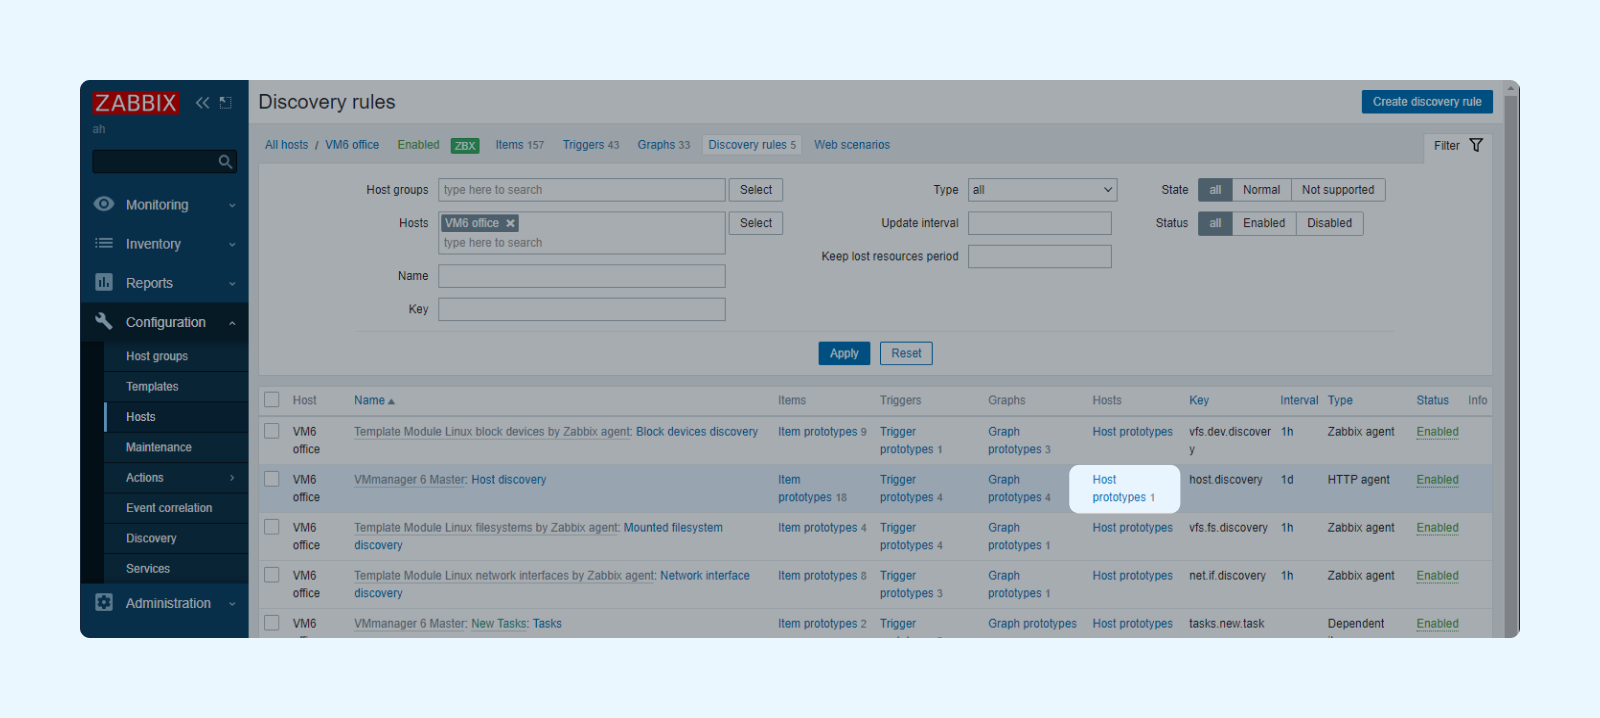
-
- 9.4. Enter Host prototypes and enable Create enabled and Discover
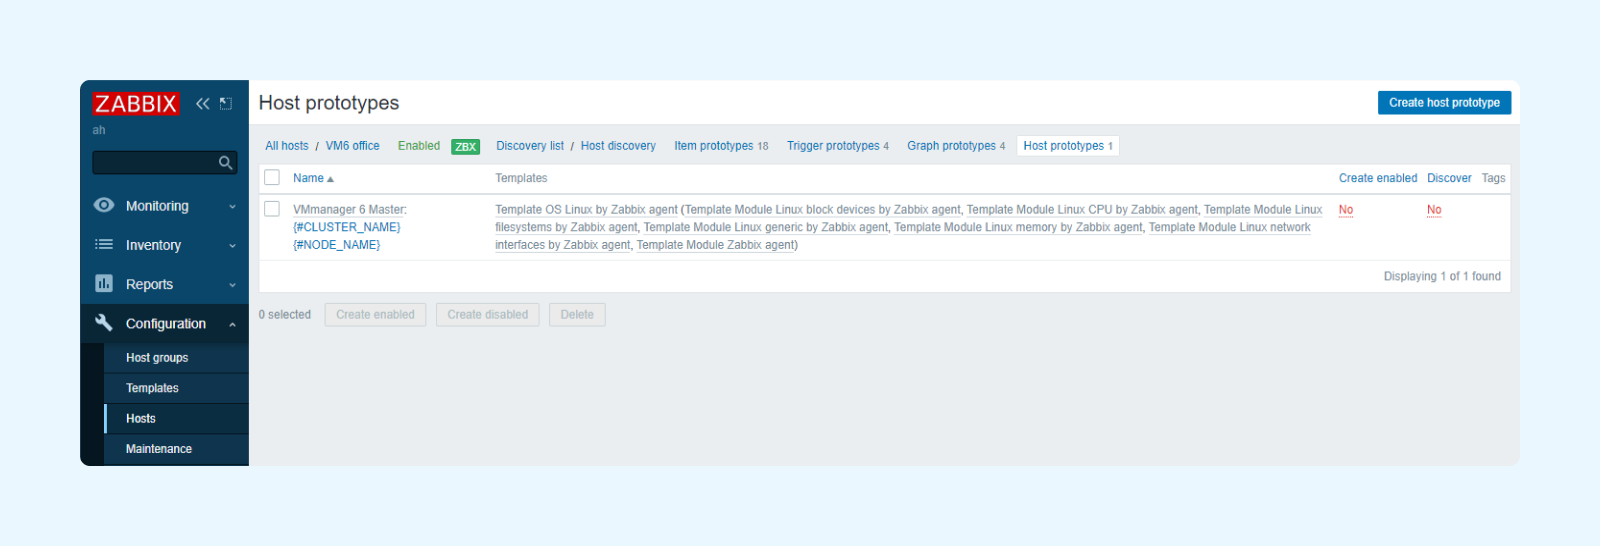
-
- 9.5. Then go to Monitoring -> Hosts, find vm6, Click on the name, then on Inventory. On the Configuration line, select Discovery
- 9.6. Select the line "VMmanager 6 Master: Host discovery" and press "Execute now"
- 9.7. Completed – Zabbix will create hosts by taking your cluster nodes via API
- 10. Zabbix will now keep track of nodes and tasks. It remains to configure sending of notifications:
- 10.1. Under Administration -> Media types, enable and configure your preferred method of sending notifications
- 10.2. Under Administration -> Users, enable your Media in your user settings
- 10.3. Under Configuration -> Actions -> Trigger actions, enable event notifications for all Media
You will now be able to monitor the state of your infrastructure in VMmanager using Zabbix. Now we have added settings to our template to track basic indicators. Tell us what metrics you would like to see in
Completed - VMmanager has been added to Zabbix monitoring. Now our template provides monitoring of the main indicators of virtual infrastructure. Share in the comments what metrics you would like to have.