 En
En
 Es
Es
A chassis is a device that provides access to shared components for blade servers and blade switches. For example, a blade server may consist of a motherboard, CPU, memory modules and NIC, and use external drives and power supplies installed in the chassis.
To manage the chassis, enter Servers → Chassis.

Adding a chassis
To add a chassis to the rack:
- Click Add chassis .
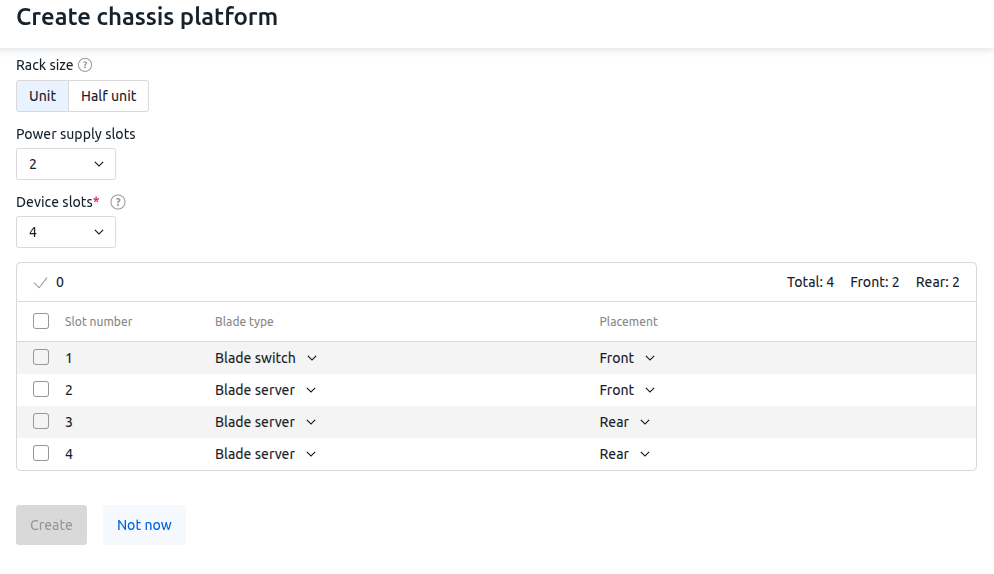
- Choose a chassis platform. If the desired platform is not listed:
- Click Create platform
- Choose the Size in units. It can be a multiple of 0.5.
- Choose the Height in units.
- Specify the number of slots for installing components:
- Number of slots for devices. For each slot, mark which types of devices it is suitable for:
- Blade server;
- Blade switch.
- Number of slots for power supplies.
- Number of slots for devices. For each slot, mark which types of devices it is suitable for:
- Click Create platform
- Specify the chassis parameters:
- Enter the Name .
- Select the Rack location.
- Select the Rack .
- Select the Unit number .
- If needed, enter the Weight in kilograms.
- Add a discretionary Note .
-
Click Add.
To delete a chassis, go to Servers → Chassis → select the desired chassis and click  → Delete chassis.
Chassis configuration
To change chassis settings or add devices to it, go to Servers → Chassis → click on the name of the desired chassis. The chassis card will open, and you can select the desired window for configuration.
Settings
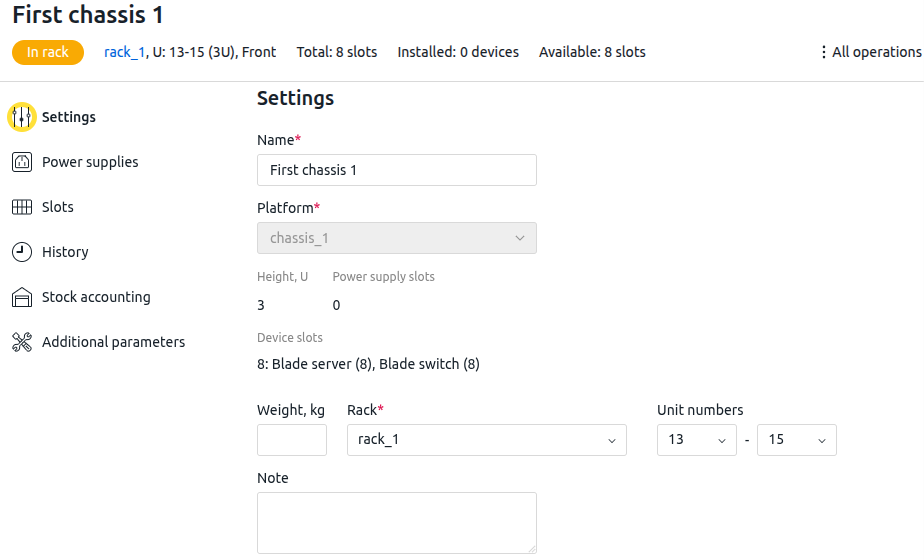
In the Settings window, you can change:
- The Name of the chassis in the platform web interface;
- The Rack and Unit numbers in the rack where the chassis is located;
- The Weight of the chassis in kilograms;
- The Note that is displayed in the chassis table.
Power supplies
To manage information about the power supplies installed in the chassis, go to Servers → Chassis → click on the name of the desired chassis → Power supplies. To add power supplies:
- Click Add power supply.
- Select the required power supplies from the warehouse.
- Click Add.
You can only add power supplies from the warehouse. If there are no free power supplies in the warehouse, but you need to add a power supply to the chassis:
- Hover over the Add power supply button. A pop-up window with a link to the window for adding a power supply to the warehouse will appear.
- Click Go to warehouse.
- Enter the required parameters for the power supply and click Add.
After that, you can add the power supply to the chassis.
To remove a power supply from the chassis:
- Select the desired power supply and click → Remove from chassis.
- Specify the Warehouse and Status.
- Click Change status.
Adding devices to the chassis
To add a device to the chassis:
- Go to Servers → Chassis → select the desired chassis and click → Installed devices → select the desired option.
- Add the desired device:
- blade server. For more details, see Adding a server;
- blade switch. For more details, see Adding a switch.
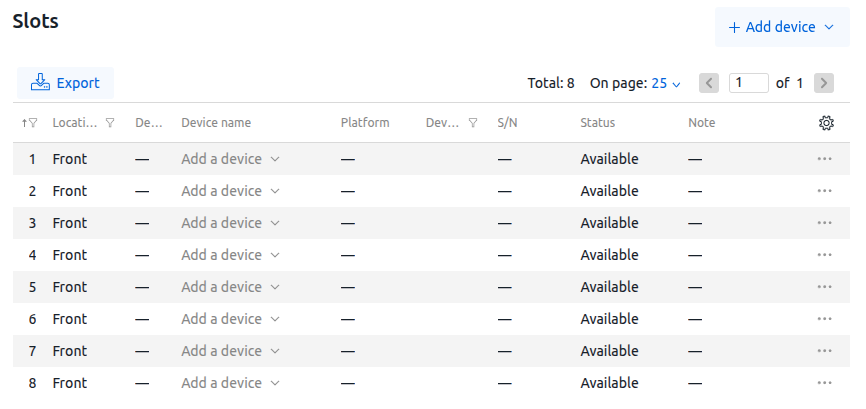
You can download the information about the devices mounted in the chassis in the CSV format. To do so, go to Servers → Chassis → select the desired chassis and click → Installed devices → click Export.
Creating chassis connections
DCImanager 6 supports two types of network connections for chassis:
Management — used for collecting metrics and monitoring resources of chassis and installed devices;
Data — used for data exchange between the chassis and the network. DCImanager 6 cannot view traffic for this type of connection.
Connecting a chassis to a power supply
To connect a chassis to a power source:
- Go to Servers → Chassis → select the chassis.
- Go to the Connected devices tab.
- Click Create connection → Connection to a power supply.
- Select the endpoint device: PDU or UPS.
- Select the location of the power source and select the device from the dropdown list.
- Click Add.
Connecting a chassis to the data network
To connect a chassis to the data network:
- Go to Servers → Chassis → select the chassis.
- Go to the Connected devices tab.
- Click Create connection → Network connection.
- Select Network type:
- Ethernet;
- Fibre Channel.
- Select the Data type.
- Select the location and type of device through which the chassis will communicate with the network.
- Click Add.
Connecting a chassis to the management network
To collect metrics, monitor operation, and track the status of the chassis, connect it to the location server. We recommend connecting the chassis to the location via a switch. The switch must be in the same subnet as the location server and have L2 connectivity with it. To connect a chassis to a management device:
- Go to Servers → Chassis → select the chassis.
- Go to the Connected devices tab.
- Click Create connection → Network connection.
- Select the Management type.
- Select the location and type of device through which the chassis will communicate with the location server.
- Click Add.
Chassis monitoring
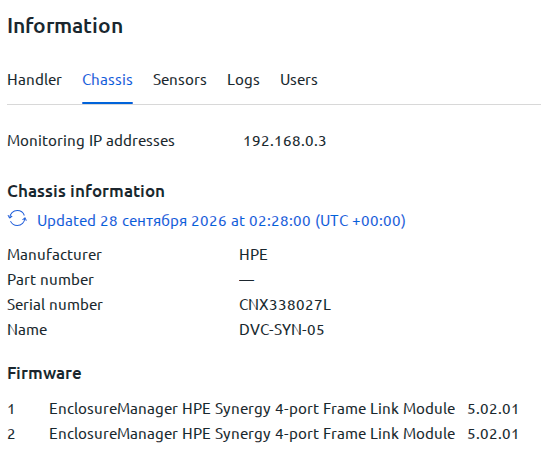
You can monitor the chassis status using the handler. The handler lets you:
- monitor chassis sensor readings;
- view firmware versions;
- view chassis logs;
- view the list of chassis users.
To add a chassis handler:
- Go to Servers → Chassis → click the name of the required chassis → go to the Information page.
- Specify the IP address for the handler connection.
- Select handler.
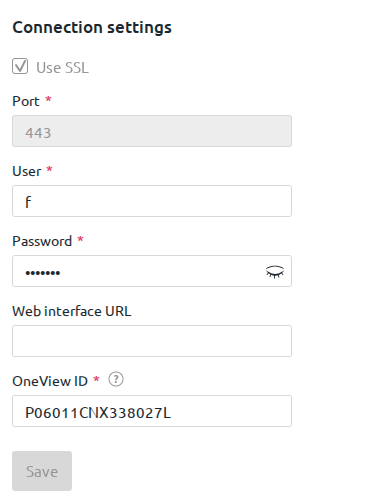
- Specify the connection details:
- Port.
- User and Password.
- OneView ID.
- If needed, specify the Web interface URL.
- Click Save.
The chassis will be polled once every five minutes. To poll the chassis manually, click Poll chassis.