 En
En
 Es
Es
Task scheduler is a platform feature that allows you to configure delayed and recurring operations on equipment.
Using the Task scheduler, you can:
- manage server power: turn on, turn off, reboot;
- if you have the Server auto-add module connected, you can also create a task for auto-adding servers via BMC. For more details about the module, see the article Server auto-add module.
To navigate to the main Task Scheduler window, click the icon  in the menu on the right. The Schedules window will open, displaying tasks in a table. For each task, the following may be displayed:
- Name;
- A toggle switch to activate or deactivate the task;
- The start time or the next start time if the task is recurring;
- Object on which the operation is scheduled;
- Action to be performed on the object;
- Note.

Creating tasks
To create a task:
- Click Create schedule. A window will open where you can specify the task parameters.
- Enter the task Name.
- Select the Location where the required equipment is situated.
- Select the Action to be performed.
The Location and Action parameters cannot be changed after the task is created. - Select the Servers on which the operation is to be performed.
- Configure the Frequency at which the action should occur:
- Once: specify the Start date and Time;
- Interval: specify the frequency, Time, and First start date.
- By day of week: select the days of the week, Time, and First start date.
- If necessary, add a Note. It will be displayed in the table in the main window.
- Click Create.
The task will appear in the table in the main window. You can activate or deactivate it using the toggle switch in the table. You can also edit most of the task parameters.
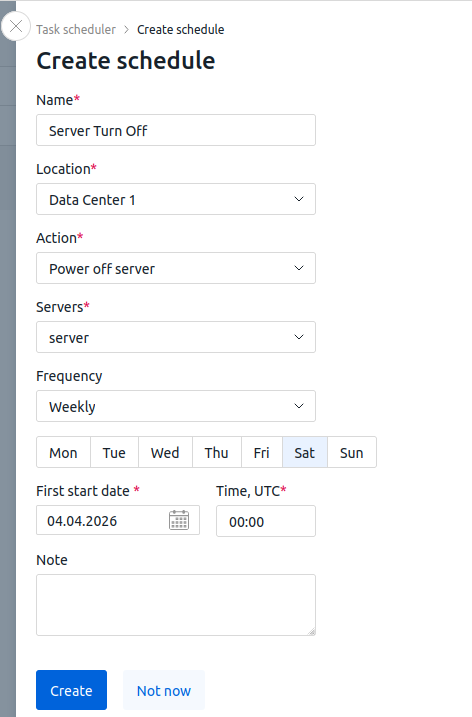
Task creation window interface
Editing tasks
To edit a task:
- Click the icon
 next to the desired task → Edit.
 - Edit the required parameters.
- Click Save.
Deleting tasks
To delete a task, click the icon next to the desired task → Delete → Delete.
Task execution history
To view the history of executed tasks, click History in the Task Scheduler window. A tab will open displaying completed tasks. For each task, the following may be displayed:
- Name;
- Start date;
- Object on which the operation is scheduled;
- Action to be performed on the object;
- Status in which the task completed. This can be Success or contain information about errors that occurred during task execution.
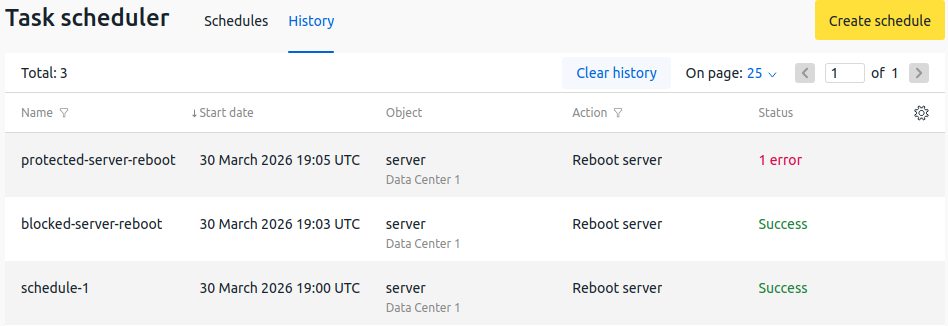
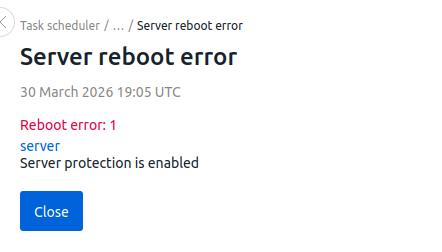
If the operation completed with errors, you can view the error information. To do this, click the field in the Status column.
Related topics: