 En
En
 Es
Es
Problem
After deleting data on a virtual machine (VM) via the web interface, the platform shows the actual amount of used file space, but the VM’s disk size on the cluster node does not change. For example, the actual disk usage is 7.9 GB, but the web interface shows 3.1 GB.
Cause
Dynamic allocation of space for virtual disks in file-based storage only works to increase disk size. Automatic shrinking of the disk after file deletion does not occur. This is a limitation of the libguestfs library.
Diagnosis
To confirm the cause:
- Connect to the cluster node via SSH. For more information about connecting via SSH, see Workstation setup.
- Check the actual disk size of the VM:
du -sh /path/to/VM_diskComment:Example outputdu -sh /vm/8_test-alma8 7,9G /vm/8_test-alma8/vm/8_test-alma8— the path to the VM disk on the node.
- Compare the obtained value with what is shown in the platform:
- Go to Virtual Machines → select the VM → Settings button.
- In the Information section, open the Storage, GB tab and check the value.
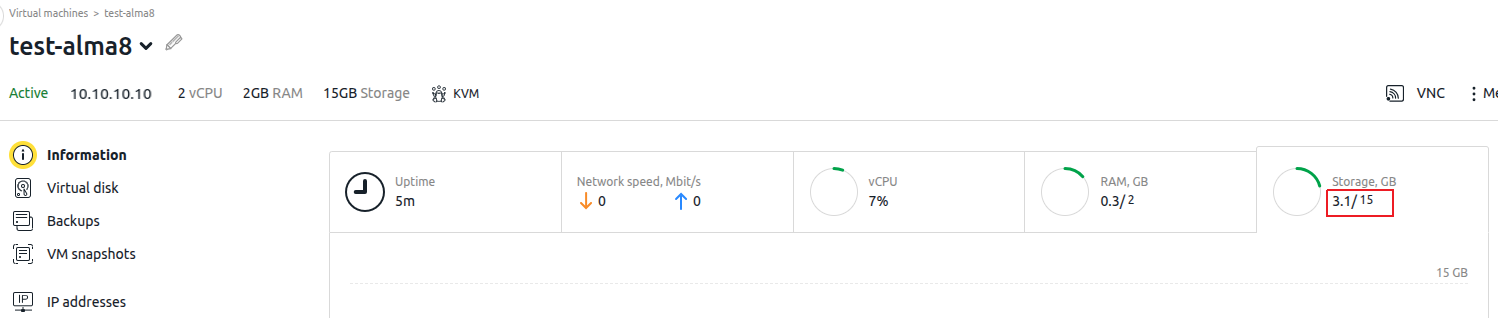
If the output of du shows a larger value than the web interface, the issue is confirmed. The VM disk is actually using more space than the web interface shows.
Solution
You can manually reduce the VM disk file size using the virt-sparsify utility. For more details, see the official libguestfs documentation. For more details, see official libguestfs documentation.
To resolve the issue:
- Switch off the VM. Go to Virtual Machines → select the VM → menu
 → Stop.
ImportantThis is necessary because virt-sparsify requires exclusive access to the disk file. If the VM remains running, it will keep modifying data on the disk while the utility is running. This could corrupt the file system inside the VM and lead to data loss. - Connect to the cluster node via SSH. For more information about connecting via SSH, see Workstation setup.
-
Rename the virtual disk file:
mv /vm/8_test-alma8 /vm/8_test-alma8.bakComment:
/vm/8_test-alma8— original virtual disk file;/vm/8_test-alma8.bak— new backup copy of the original file.
- Run the optimization to create a compacted disk file:
virt-sparsify /vm/8_test-alma8.bak /vm/8_test-alma8virt-sparsify reads the backup
Comment:test-1.bakand creates a new compacted filetest-1./vm/8_test-alma8.bak— original virtual disk file;/vm/8_test-alma8— new backup copy of the original file.
- Start the VM. Go to Virtual Machines → select the VM → menu → Start.
- Verify the result. Make sure the VM starts without errors and that du shows the correct VM disk size:
Example command and outputdu -sh /vm/8_test-alma8 3,1G /vm/8_test-alma8Comment:
/vm/8_test-alma8— the path to the VM disk on the node.
- After successful verification, remove the backup:
rm /vm/8_test-alma8.bak