 En
En
 Es
Es
Localization allows you to set up the billing system according to your country document system.
In order to add a localization for your language, complete the following steps:
- Select currencies for payments
- Add document languages
- Add document types
- Create a list of required information that a payer should enter to make a payment
- Add document templates associated with documents you will use
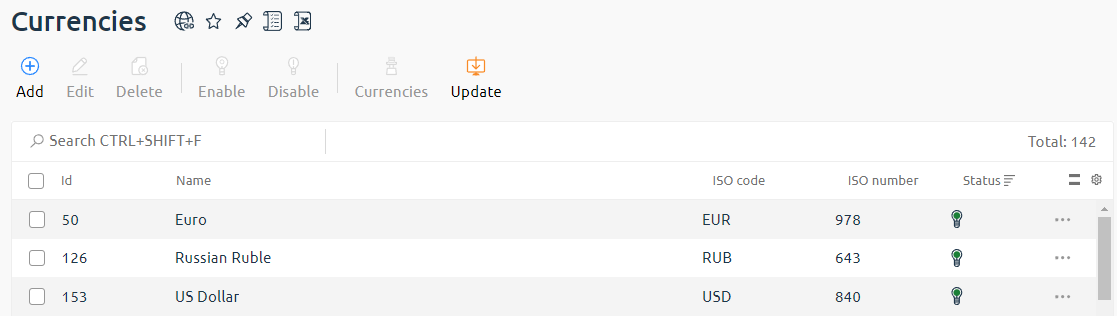
Currencies
The administrator of the control panel can enable or disable currencies used by the billing system — Directories → Currencies. The active currencies will be available for selection in all menus where currency is requested: setting of payment methods, provider etc.
Currency exchange rate
To set your currency exchange rate, in the let menu go to Directories → Currencies → select the currency → Currencies → select the target currency → Rate → Add.
For example, to set your own Euro exchange rate to the US dollar:
- Specify the Date from which the exchange rate will apply. For example, the date is June 8th, 2022.
- Specify the Number of currency, i.e. how many units of currency are converted to another currency. For example, it is 1 unit.
- Specify the currency Rate . For example it is 2. Press Ok to save the changes.
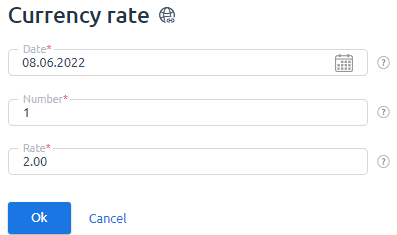
According to the rate set by you, from June 8th, 2022 on, 1 EUR in biling will be equal to 2 US dollar 00 cents. This rate will be used until you create a new rate or enable automatic currency rate updates. When the currency rate is updated automatically, BILLmanager receives the values set by the Central Bank (CB) of the state.
To enable automatic downloading of the current rate for the selected currency, go to Directories → Currencies → select the currency → Currencies → select the target currency → Rate → Upload:
- Enable the option Upload automatically. The currency rate will be uploaded automatically at a specified time.
- Set the currency exchange rate Upload time.
- If necessary, enable the Upload now option. The currency exchange rate will be updated with the specified parameters.
- You can specify the Correction factor. The uploaded exchange rate will be multiplied by the value indicated in this field.
- In the Increase by field you can enter the value to be added to the downloaded exchange rate. To reduce the exchange rate, you can enter a negative value in this field.
-
If the Upload now option is enabled, the Overwrite existing values option appears. If this option is enabled, the values stored in the system will be overwritten Start date specified in the corresponding field.
Overwriting the exchange rate values will not affect the payments and expenses in which these values were used. - Press Ok to save the changes.

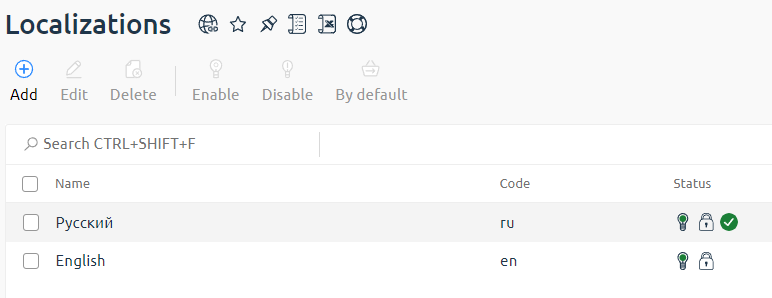
Language
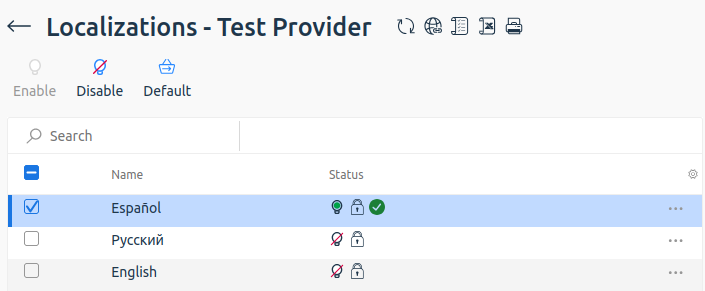
In Settings → Localizations you can manage languages available in the billing platforml. By default, only translated interface languages are displayed.
Localization states
| Image | Definition |
|---|---|
| Localization by default | |
| Built-in localization | |
| Localization is active | |
| Localization is not used |
Localization by default — localization that was selected in the initial configuration wizard. If there is no localized name, description or message template, the default system language will be used.
Built-in localization — localization that is available out of the box from BILLmanager. It includes full interface translation. Russian and English localizations also have additional translated document templates.
Localization is active — location can be used.
Localization is not used — localization is created, however, it isn't available yet.
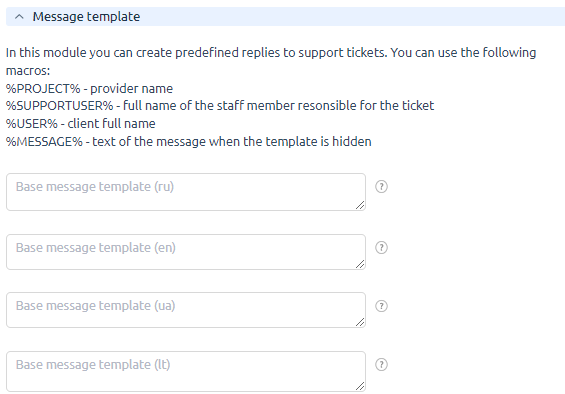
If the required language is missing, you can always create it. The new language won't be build-it in a billing system, but you can use it in document and message templates. At this moment, you can't change the interface language to the one that you have just created.
When you add or activate a localization, many forms (e.g. a tariff or product type add/edit form) will contain a new field where you can enter names in the selected language. These names will be used in documents.
Example of the localized tariff name:
On the authorization page, you can select your interface language. You can choose only active localization that has the translated interface:
To make the connected localization available at authorization page, add a corresponding entry to the BILLmanager database:
- Connect to the server with the platform via SSH. For more information about connecting via SSH, see Workstation setup.
-
Enter the command:
mysql billmgr -e 'update locale set embedded="on" where id="locale_id"'Comments -
Clear BILLmanager database cache:
rm /usr/local/mgr5/var/.db.cache.* -f -
Restart BILLmanager control panel:
/usr/local/mgr5/sbin/mgrctl -m billmgr exit
 → Display fields: → enable Id option → Ok.
Provider language
You can select a separate localization for each provider. This will be applied instead of the global one.
To select a localization for a provider, go to Provider → Providers → select a provider → the Localizations button. The section displays active global languages. If the provider does not have any localization enabled, global settings will be used.
Provider localization changes the language of:
- platform interface;
- pop-up notifications;
- email notifications.
If the client uses an interface language that is active in the provider's localizations, notifications will be sent in the selected language. If the client's language is not among active localizations of the provider, the default localization of the provider is used for notifications.
For notifications that are not bound to a provider, global default localization can be used. This happens if the client is bound to several providers. For example, this logic will be used to select the localization of the notification about payment crediting.
Document types
In Directories → Countries, you can set types of documents that are available for a specific country. The following types of documents are available:
- Reconciliation report
- Invoice
- Envelope
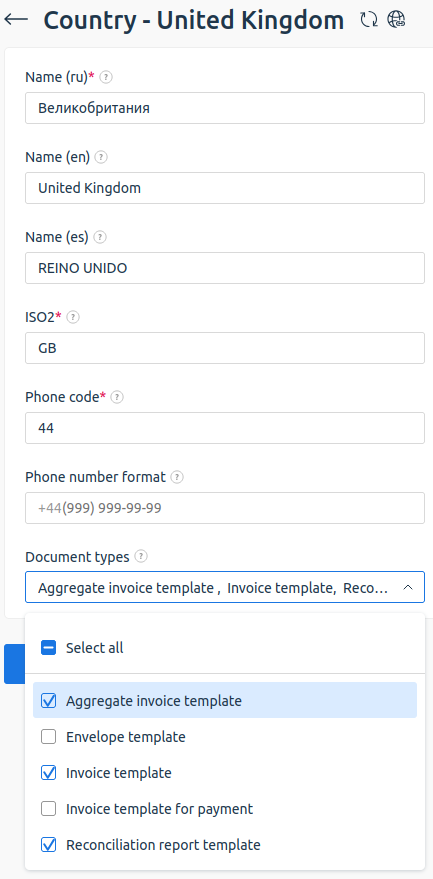
When you create a company, you need to select a country in the Legal address field. Depending on that company, specific documents will be available to your clients.
If you do not select any document types for a certain country, companies from that country won't be able to generate documents of those types.
If you disable the document type that you have used, you won't be able to print documents of that type.
Document templates
A list of the documents templates available is located in Settings → Document templates. You can add your own templates or use the existing ones.
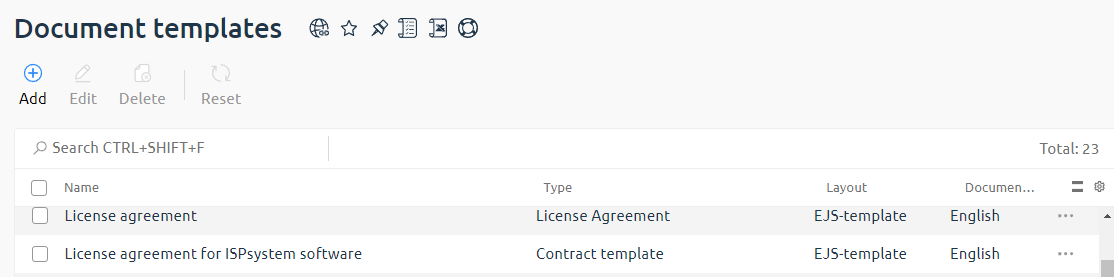
To bind a template to a localization, select the template → click Edit → select the language you want to bind to. Without specifying the language in the template, you will not be able to select it in the company settings.
To connect a template to localization, you need to set the language in template parameters. If you don't clarify the language, you won't be able to select it in your company settings.
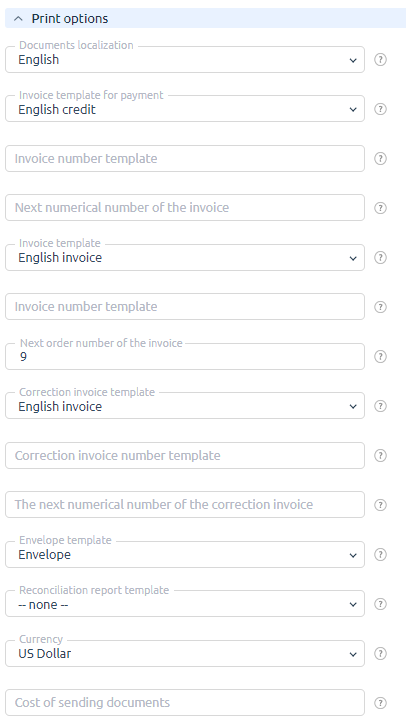
Document localizations have to be configured for every company. You can select a language while:
- creating a company. Read the article Company;
- editing company configuration in "Print options".
List of the available languages is generated depending on active localizations.
Creating your own template requires skill in working with EJS templates. It is better to use a pre-defined template and edit it according to your needs. For more information, see the Document EJS-templates article and the Working with EJS-templates documentation section.
Payer information
In Directories → Countries → Parameters button you can select the information that a payer from a certain country will be asked to provide. The data will be used in documents. For some countries, the list of details has been created and configured in accordance with accepted document flow rules. For more information on parameter settings, see the article Parameters of payers and companies.
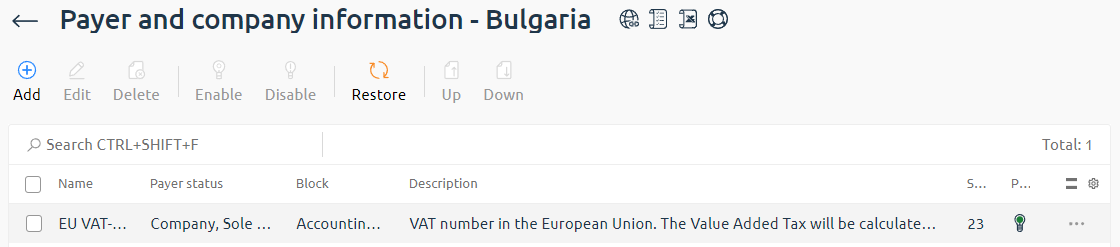
Payer and company information
Example 1.
If you add a new parameter "Registration date " for your users, you will be able to use it in documents (you will need to add it to your document template). When a client tries to make a payment, BILLmanager will ask those clients who didn't provide that parameter to enter it for the payer on the payment form.
Example 2.
If you have deleted a parameter, e.g. "Vat number", new clients won't be asked to enter it. If you didn't edit the document template where this parameter was used, then an empty field will be displayed instead of "VAT" unless you delete it from the template.