Pterodactyl is a control panel for managing game servers. Integration of BILLmanager with Pterodactyl allows you to automate game server services. For more information about Pterodactyl, see the official documentation.
Configuration on the Pterodactyl side
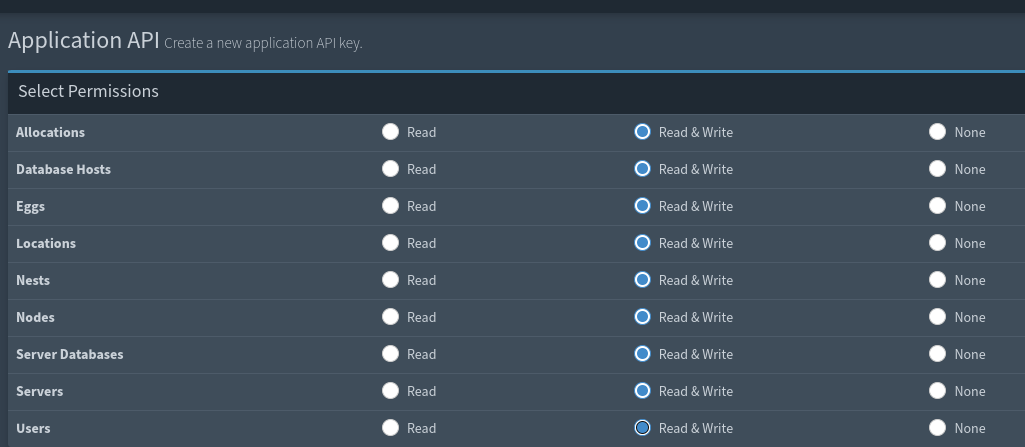
- Create a panel API key:
- Create an API key for the integration user:
- Click the
 icon to enter the account settings.
 - Enter the API Credentials section.
- In the Description field enter the name of the key.
- Click the Create button.
- Save the key value.
- Click the
- Create locations and nodes. The Wings daemon must be running on the servers acting as nodes. Nodes must be assigned allocations — combinations of IP addresses and ports. See the Pterodactyl documentation for details. Each new server will be assigned a free address from the allocation of the node on which the server is deployed.
Configuration on the BILLmanager side
Adding a processing module
To add the Pterodactyl processing module to the platform, install it:
- Connect to the server with the platform via SSH. For more information about connecting via SSH, see Workstation setup.
- Install the required software packages: Ubuntu
apt install -y make billmanager-corporate-dev billmanager-plugin-python-libs python3-venvAlmaLinuxdnf install -y make billmanager-corporate-devel billmanager-plugin-python-libs - Go to the /root/ directory:
cd /root - Copy the BILLmanager repository:
git clone https://github.com/ISPsystemLLC/billmanager - Go to the directory with the module:
cd billmanager/processing/game_server/bill-pter-bridge - Start the installation:
make
Connecting a processing module
To create a processing module, go to Integration → Processing modules → Add button:
- Product type — select Game server. If the Game Server product type is missing in the platform settings, create it manually. For more information on how to create a product type, see the Product type parameters article. In the Internal name field specify
game_server. - Processing module — select Pterodactyl.
- Integration customization:
- URL — enter the URL of the Pterodactyl server.
- Panel API key — enter the created panel API key.
- User API key — enter the created user API key.
- Location ID — enter the id of the Pterodactyl location.
- Parameters of the service processing module. Configure internal (within BILLmanager) parameters of the service processing module:
- Data center — select the data center in BILLmanager to which the processing module will be connected.
- Name — specify the name of the processing module to be displayed in the BILLmanager interface.
- Department — select the department to which tasks from the processing module will be assigned.
- Sort — specify the processing module’s priority. If more than one processing module is connected to a tariff plan, the processing module with the lowest priority is selected first when creating the service.
Tariff configuration
To configure a tariff, go to the Products → Tariff plans → Add button:
- Product type — select Game server.
- Tariff plan parameters:
- Processing module — select the created processing module for Pterodactyl.
- Processing module settings:
- Nest — select the required Nest — game server engine.
- Egg — select the required Egg — game server type.
For more information on creating tariff plans, see the article Creating, customizing, archiving a tariff.
Product type parameters
To manage the default settings, go to Products → Product types → Game Server → Parameters → select the parameter to change → click Edit. For more information, see Product types.
General product type parameters:
For security purposes, the platform generates the client's login and password automatically at the time of ordering.
To add a parameter, go to Products → Product types → Game Server → Parameters → click Add. The product content may include parameters:
For each variable in a Nest-Egg combination with mandatory fields and no default values, you need to add an additional parameter to the product type:
- Go to the Products → Product types → Game server → Parameters button → Add button.
- Specify settings:
- Internal name — enter the name of the Pterodactyl variable.
- Enable the Allow connecting to tariff plans option.
- Enable the Show during order option.
- Enable the Required parameter option.
Related articles:
 En
En
 Es
Es
 icon to enter the administration panel.