 En
 Es
This article describes the BILLmanager installation process. The billing platform can be installed on a server that meets the system requirements.
Preparation
- Ensure that the superuser (root by default) of the operating system (OS) has a password set. If system access is configured only via an SSH key, set a password using the command:
sudo passwd root - Ensure the server has Internet access, as the installation script contacts ISPsystem servers to obtain a license.
- Disable SELinux when installing on a server with AlmaLinux OS. This step is not required when installing on a server with Astra Linux or Ubuntu OS.
License activation
For a description of existing license types, see the article Types of licences.
A trial license is activated automatically after you have installed BILLmanager on the server. You don't need to order a license.
If you want to use a commercial version you first need to purchase the license. Specify the public IP address of the server where the control panel will be installed.
If the server runs behind the NAT and IP address is assigned to its network interface, the BILLmanager license will be activated during the installation.
Installation
In addition to BILLmanager, the script will install additional software on the server required for the billing platform to work:
- database server:
- for AlmaLinux, Astra Linux OS — MySQL, MariaDB;
- for Ubuntu OS — MySQL;
- web server — ihttpd;
- JavaScript platform — Node.js.
Installation steps:
- Connect to the server via SSH with superuser privileges. For more information on SSH connection, see the article Workstation setup.
- If the
curlutility is not installed on the server, install it:dnf install curl || apt install curlLearn more
Download the installation script:curl -O https://download.ispsystem.com/install.sh -
Run the script:
-
To install the latest version of the platform, run:
sh install.sh BILLmanager -
To install a specific version of the platform, run install.sh with the --release parameter. The version number is specified in the format described in Changelog, for example, 6.64.0.
sh install.sh --release <version_number> BILLmanager
-
- During execution, the script will prompt you to select a platform update branch. Enter the corresponding letter and press Enter:
s) Stable version— a stable system version that has successfully passed beta testing;b) Beta version— a version with the latest features, but currently in beta testing;
ispsystem-base.repofor installing basic software;ispsystem.repofor installing the required BILLmanager versions.
- Wait for the installation to complete.
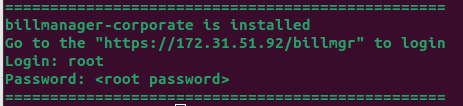
Successful installation message
If the installation fails, review the installation script output: it may contain information about the cause of the failure.
https://<IP_address_or_server_domain>/billmgr in your browser. For authorization, use superuser credentials. For more information, see Web interface authentication.Actions after installation
After installation, perform the actions specified in the article Initial Configuration Wizard.
Related topics: