BILLmanager can automatically issue bank payments at regular intervals. This feature allows customers to select the period and method of invoicing by bank details. Once configured, the invoice will automatically appear in the Billing → Payments section and will be available for downloading or printing. If the client is subscribed to financial notifications, they will also receive an email with the invoice.
The module offers users settings to automate the invoicing process. It allows setting up the period in which the invoice will be issued, depending on various conditions. It is also possible to customise the amount of the invoice — make it fixed or equal to the cost of services for the period. In addition, the system allows you to configure the services that will be included in the invoice. For more details, please refer to Step 4: Configure auto-invoicing settings.
Module installation
To install the module, go to Integration → Modules → Automatic Invoicing (bank) → click Install.
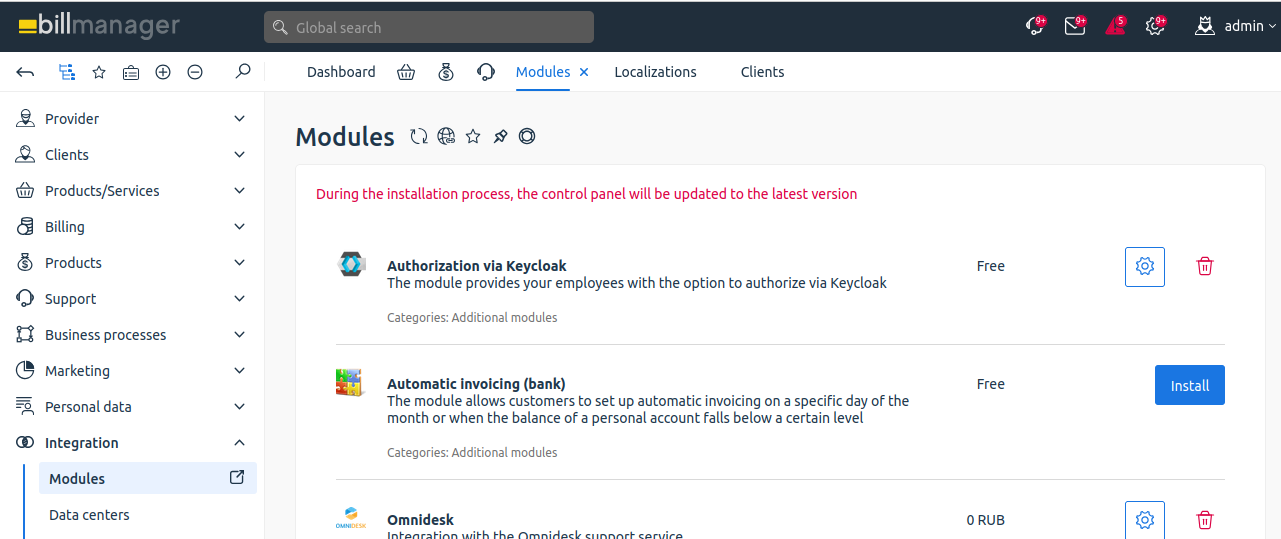
Once the module is installed, the client will have a menu item in Billing → Invoicing. This item is displayed only when you are logged as a client.
Setting up automatic invoicing on the client side
The client can configure the module:
- Billing period — it is necessary to specify the period for which the cost of services will be calculated — day or month;
- Service selection — it is necessary to choose which services will be included in the invoice — all or only with auto-renewal;
- Unpaid charges — additional unpaid charges, if any, can be included on the invoice and grouped by service into one line item.
To configure automatic invoicing, go to Billing → Invoicing → Configure:
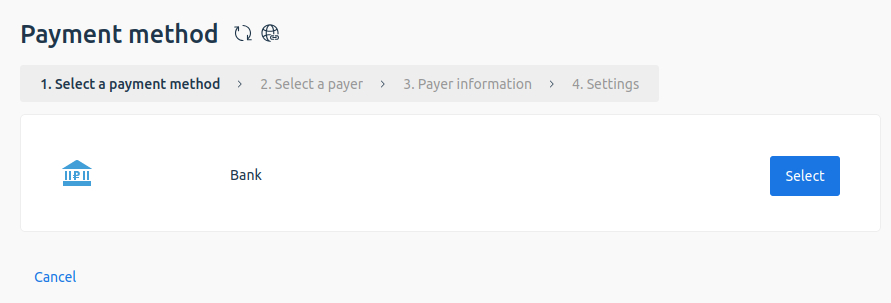
Step 1: Select payment method
Choose a payment method from those offered and click Select.
Step 2: Select a payer
Select a payer or create a new one.
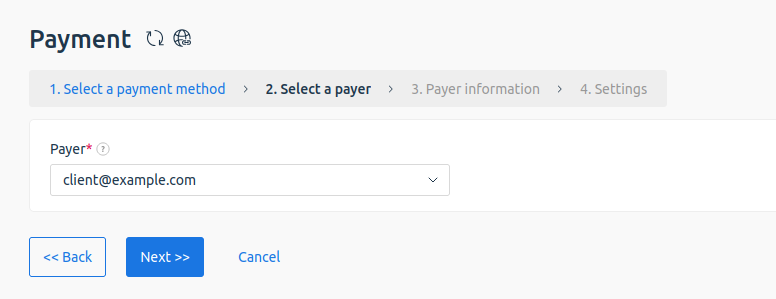
Click Next.
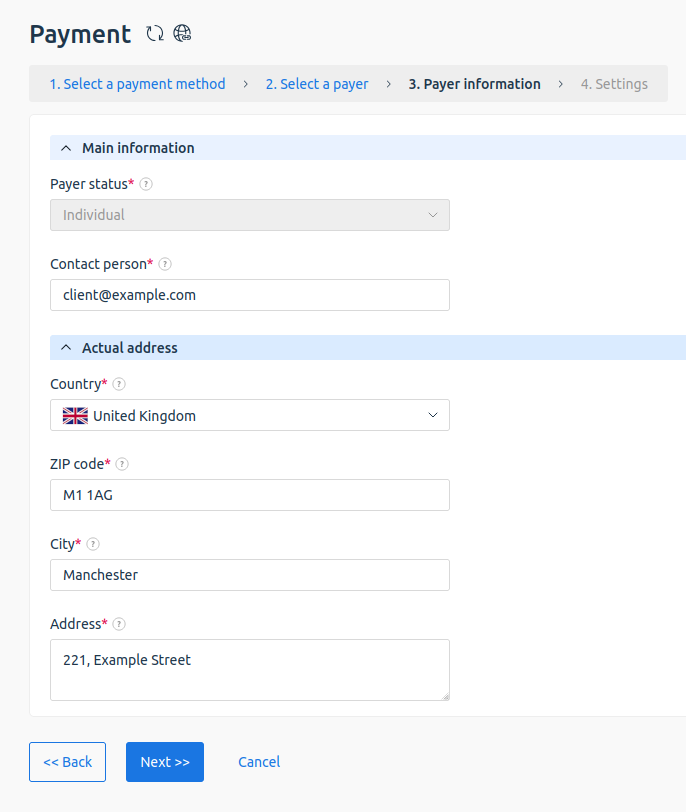
Step 3: Verify payer information
Check that the payer information is correct. If necessary, correct the information or go back to the previous step to change the payer. Once you have verified that all the information is correct, click Next.
Step 4: Configure auto-invoicing settings
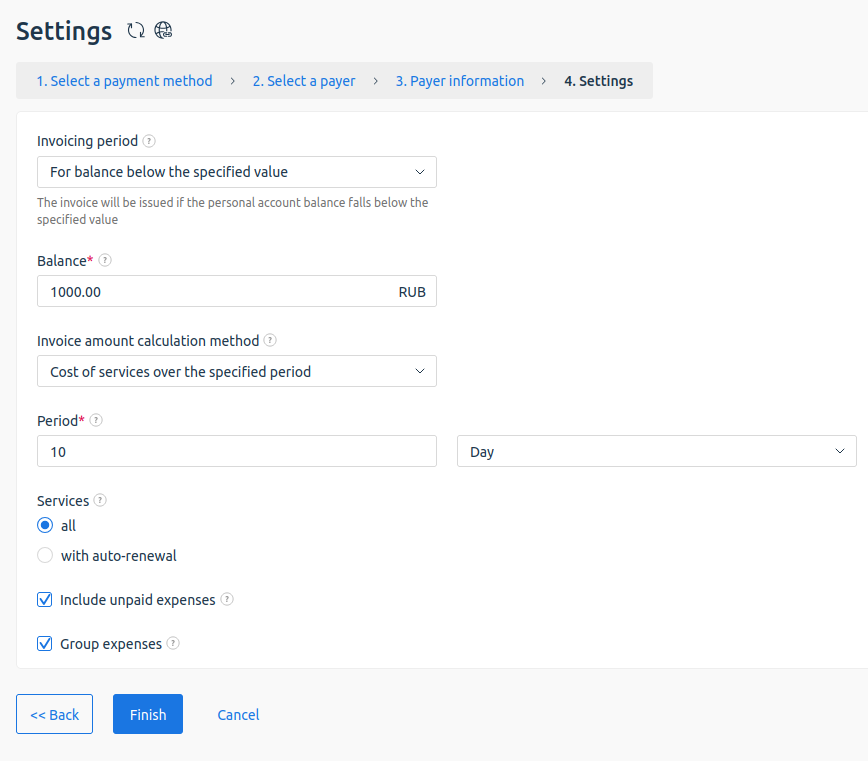
- Select Invoicing period:
- For the balance below the specified value — enter the balance value. The invoice will be automatically raised if the customer's personal account balance decreases below the specified level. The balance must remain positive.
- On a specified day of the month — it is necessary to specify a day of the month, on which the invoice will be raised. If the specified date does not exist in the current month, the invoice will be raised on the nearest day to this date. For example, if you want to be invoiced on the 31st day of the month, you will be invoiced on the 28th day in February (or 29th day in a leap year) and on the 30th day in April, June, September and November.
- Determine the Invoice amount calculation method:
- Fixed amount — you need to specify the Amount for which the system will issue an invoice;
- Cost of services over the specified period — you need to select services to include and specify the period for which the cost of services will be calculated:
- Specify the period for which the cost of services will be calculated — in days or months. The period is limited to three months.
- Add to the invoice either all services or only services with auto-renewal.
- To include last month's unpaid expences, select Include unpaid expences.
- If you include unpaid charges on your bill, you can Group expences. In this case, the expenses for each service will be grouped alphabetically on one line. The name of the service will be shown instead of the description of the expense item.
- Click Finish.
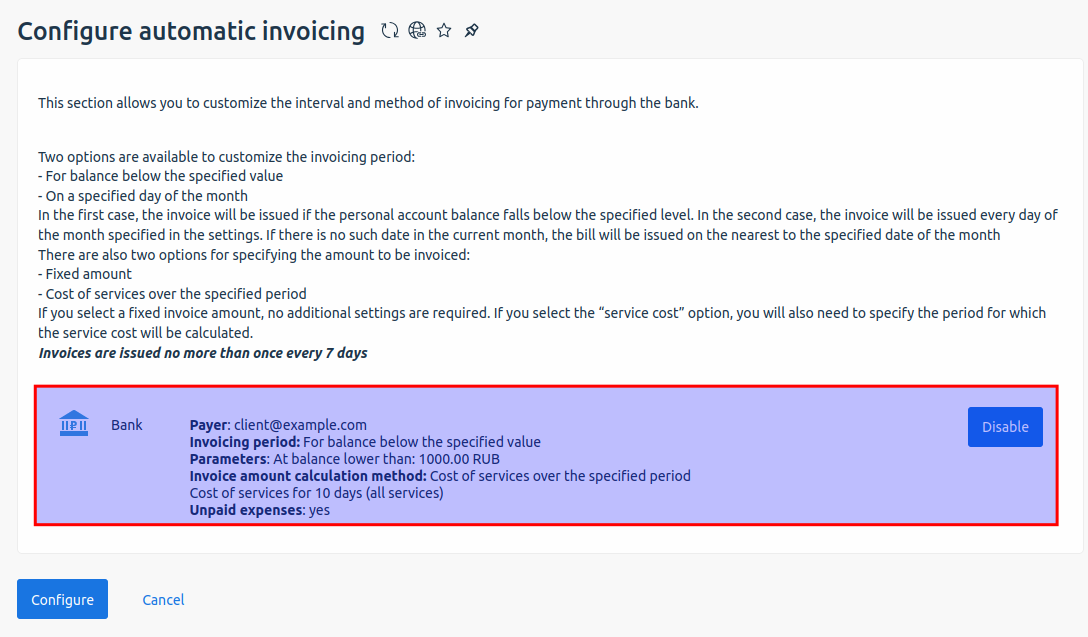
After setting up automatic invoicing, the payer and bank information will be displayed in the Invoicing menu. To cancel automatic invoicing, click Disable.
Additional information
Configuring scheduled autoinvoicing
Auto-invoicing works on a schedule. By default, the cron job scheduler is configured to invoice every 4 hours at the 30th minute of the hour.
To change the start time, configure the settings for the autoinvoice.cron command in the scheduler.
For more information on how cron works, see the article Cron Scheduler.
Sending invoices
Each client's invoice will be sent by email.
Removing the module
To delete a module, go to Modules → Automatic Invoicing (bank) →  button.
Related articles:
 En
En
 Es
Es